


Maintaining an efficient coolant system is crucial for the overall health and performance of your vehicle’s engine. Over time, the coolant can become contaminated with rust, debris, and other materials, leading to potential overheating and engine damage. Regularly flushing and refilling your coolant system ensures the longevity and reliability of your engine.
This guide will walk you through the essential steps to effectively flush and refill your coolant system, allowing you to keep your vehicle in optimum condition. Understanding the importance of a clean coolant system and knowing how to perform this maintenance task yourself can save you both time and money in the long run.
We’ll cover the necessary tools and materials you’ll need, the step-by-step process to drain the old coolant, flush the system, and refill it with fresh coolant. Additionally, you’ll learn about proper disposal methods for used coolant and tips for maintaining your coolant system in the future. Whether you’re a seasoned mechanic or a novice car owner, this guide will provide you with the knowledge and confidence to tackle this important maintenance task.
How to Properly Drain the Old Coolant
Draining old coolant is a crucial step in maintaining your vehicle’s cooling system. First, ensure the engine is cool to prevent burns. Open the hood and locate the radiator drain valve, typically found at the bottom of the radiator. If your vehicle lacks a drain valve, you may need to remove the lower radiator hose instead.
Place a large drain pan beneath the radiator to catch the old coolant. If using a drain valve, slowly open it using a wrench, allowing the coolant to flow into the pan. If you’re removing the lower hose, carefully loosen the clamp and gently pull the hose off, directing the coolant into the pan.
As the coolant drains, inspect the condition of the fluid. Old coolant may appear dark, murky, or contain particles, indicating the need for replacement. After draining, close the valve or reattach the hose and secure it with a clamp. Ensure all coolant has been expelled from the system by running the engine briefly and checking for additional leaks.
Dispose of the old coolant properly, as it is toxic and harmful to the environment. Many auto parts stores and service centers accept used coolant for recycling. Make sure to follow local regulations for hazardous waste disposal.
Step-by-Step Instructions for Flushing the Cooling System

Flushing the cooling system is essential for maintaining optimal engine performance and longevity. Follow these detailed instructions to perform the task effectively.
Step 1: Gather Necessary Tools and Materials
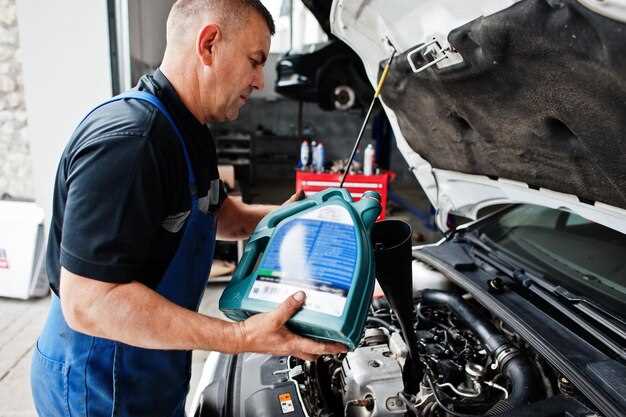
Before starting, gather all required tools and materials. You will need a socket set, radiator flush solution, a garden hose, a drain pan, and new coolant. Additionally, have a funnel, safety gloves, and safety goggles ready for protection.
Step 2: Prepare the Vehicle
Park the vehicle on a flat surface and ensure the engine is cool. Engage the parking brake and open the hood. Locate the coolant reservoir and the radiator cap. Remove any debris around these components to prevent contamination.
Step 3: Drain the Old Coolant
Place the drain pan under the radiator’s drain plug. Open the drain plug and allow the old coolant to completely drain out. If your vehicle doesn’t have a drain plug, disconnect the lower radiator hose to achieve full drainage. Dispose of the old coolant according to local regulations.
Step 4: Add Radiator Flush Solution
After draining the old coolant, close the drain plug or reconnect the radiator hose. Pour the radiator flush solution into the coolant reservoir or directly into the radiator. Fill with water as recommended by the product instructions, and then replace the radiator cap.
Step 5: Run the Engine
Start the engine and let it idle for about 10-15 minutes. This allows the flush solution to circulate throughout the cooling system. Watch for any leaks during this process and ensure the engine reaches its normal operating temperature.
Step 6: Flush the System with Water
Turn off the engine and allow it to cool down. Once cool, drain the flush solution by repeating the steps in Step 3. After the system is empty, use a garden hose to fill the radiator with clean water. Run the engine again for about 5 minutes with the heater set to maximum, then turn off the engine and drain the water. Repeat this process until the water runs clear.
Step 7: Refill with New Coolant
Once the system is clean, close the drain plug or reconnect the lower radiator hose. Using a funnel, refill the cooling system with the recommended type of coolant. Be sure to fill it to the appropriate level, which can be checked on the reservoir or radiator neck.
Step 8: Bleed the Cooling System
To remove any air bubbles from the system, start the engine and let it idle until it reaches normal operating temperature. Monitor the coolant level and top off as necessary. Some vehicles may have a special bleed valve; consult your owner’s manual for specific instructions.
Step 9: Dispose of Fluids Properly
Ensure that you properly dispose of the old coolant and any used flush solutions according to your local environmental regulations. Never pour these fluids down the drain or on the ground.
Step 10: Check for Leaks
After completing the process, inspect all connections and hoses for leaks. Monitor the coolant level over the next few days, and if any drop is detected, investigate the cause and address it immediately.
Following these steps will help ensure that your vehicle’s cooling system operates efficiently, preventing overheating and extending the lifespan of the engine.
Tips for Choosing and Adding New Coolant
When selecting coolant for your vehicle, always refer to the owner’s manual to determine the recommended type and specifications. Different engines require specific formulations to function optimally.
1. Choose the Right Type of Coolant: Coolants are typically categorized as either organic acid technology (OAT), inorganic acid technology (IAT), or hybrid organic acid technology (HOAT). Understanding the differences will help ensure compatibility with your engine’s requirements.
2. Consider Seasonality: If you live in an area with extreme temperatures, opt for a coolant that provides adequate freeze and boil protection. Most modern coolants offer broad temperature ranges, but check the label for specifics.
3. Check the Color: While the color of coolant does not indicate its effectiveness, mixing different colors can lead to chemical reactions that may cause system damage. Stick to the same color or, better yet, the same brand for refills.
4. Purchase Pre-Diluted or Concentrated Options: Pre-diluted coolant is user-friendly and ready to use, while concentrated coolant requires specific attention to dilution ratios. If opting for concentrated coolant, ensure you follow the manufacturer’s instructions carefully.
5. Avoid Water Addition: While distilled water can be used for dilution, adding tap water can introduce minerals and impurities that may harm the cooling system over time. Always follow the recommended mixture ratio provided on the coolant packaging.
6. Inspect for Compatibility: If your vehicle was previously filled with a specific type of coolant, switching to another type might not be advisable unless the system has been thoroughly flushed. Using incompatible coolants can lead to sludge formation and cooling system failure.
7. Follow Proper Filling Procedures: Always add coolant when the engine is cold. Remove the cap slowly to relieve any pressure and prevent burns. Fill to the designated level, taking care not to overfill, as this can affect system function.
8. Regular Maintenance: After adding new coolant, monitor the system for leaks and check the coolant level regularly. Regular maintenance ensures your engine remains protected and functions efficiently.