For automotive enthusiasts and serious drivers alike, upgrading to a performance fuel pump can be a game-changer. A higher-performance pump ensures that your engine receives the optimal amount of fuel needed for improved power, efficiency, and overall performance. Whether you are planning to modify your vehicle for racing or simply looking to enhance its capabilities, understanding the process of installing a performance fuel pump is essential.
This guide will walk you through the key steps involved in the installation, including selecting the right fuel pump for your vehicle, preparing your workspace, and executing the installation safely and effectively. Proper attention to detail during this process can prevent potential issues later on, ensuring your vehicle runs smoothly after the upgrade.
Additionally, we will address common challenges that may arise during installation and provide troubleshooting tips to help you navigate any obstacles. By following this comprehensive guide, you will be equipped with the knowledge to successfully install a performance fuel pump, enhancing your vehicle’s performance and your driving experience.
Choosing the Right Fuel Pump for Your Vehicle Model
Selecting the appropriate fuel pump for your vehicle involves several critical considerations to ensure optimal performance and compatibility. The first factor to assess is the fuel pump type. There are primarily two types: in-tank and inline pumps. In-tank pumps are generally quieter and provide better pressure regulation, while inline pumps can be easier to access for replacements.
Next, you need to identify the fuel flow rate required by your engine. This is often measured in gallons per hour (GPH) or liters per hour (LPH). An underperforming pump may lead to inadequate fuel supply, resulting in engine sputtering or performance loss, while an oversized pump may cause excessive fuel pressure, potentially damaging your engine’s fuel injectors.
It is also crucial to consider the fuel type your vehicle uses, as pumps are designed for either gasoline or diesel fuels. Ensure that the pump materials are compatible with the specific fuel type to prevent corrosion and ensure longevity. In addition, check for any OEM specifications. Refer to your vehicle’s manual or consult your manufacturer to ensure you choose a pump that meets the original equipment manufacturer standards.
Finally, consider the power specifications, including the voltage requirements and amperage draw of the fuel pump. Some aftermarket pumps may require different electrical setups, so make sure your vehicle’s electrical system can accommodate the chosen pump without any modifications.
Step-by-Step Process for Safely Installing a Performance Fuel Pump

Installing a performance fuel pump is a critical task that requires attention to detail and safety precautions. Follow these steps to ensure a successful and safe installation:
Step 1: Gather Necessary Tools and Materials
Before starting, ensure you have all required tools at hand. Typical tools include a socket set, wrenches, screwdrivers, and pliers. Additionally, have the new fuel pump, fuel lines, and any necessary connectors or adaptors ready for installation.
Step 2: Disconnect the Battery
Safety should be your top priority. Disconnect the negative terminal of the vehicle’s battery to prevent any electrical mishaps during the installation process.
Step 3: Relieve Fuel System Pressure
Locate the fuel pump fuse or relay in the fuse box and remove it, then start the engine and let it run until it stalls. This process relieves any residual fuel pressure in the system, reducing the risk of spills when you disconnect fuel lines.
Step 4: Access the Fuel Pump
Depending on your vehicle, you may need to remove the fuel tank or access a fuel pump access panel. Carefully follow the manufacturer’s instructions for your specific make and model to avoid damaging any components.
Step 5: Disconnect Fuel Lines
Using appropriate tools, disconnect the fuel lines connected to the old fuel pump. Be prepared for small amounts of fuel to spill and have a rag ready to absorb any leaks.
Step 6: Remove the Old Fuel Pump
Unscrew any bolts or fasteners holding the old fuel pump in place. Gently lift the pump out, taking care to observe how it is oriented for proper installation of the new unit.
Step 7: Install the New Fuel Pump
Position the new performance fuel pump in the same orientation as the old one. Secure it using the original bolts or fasteners. Ensure all gaskets or seals are in good condition to prevent leaks.
Step 8: Reconnect Fuel Lines
Attach the fuel lines to the new pump, making sure to tighten them securely to prevent any leaks. Verify the connections are oriented correctly to ensure optimal flow.
Step 9: Reinstall Any Components
If you removed the fuel tank or access panel, carefully reinstall these parts. Make sure all connectors and wiring harnesses are securely fastened.
Step 10: Reconnect the Battery and Test
Reconnect the negative battery terminal. Turn the ignition key to the “on” position without starting the engine. This action allows the fuel pump to prime the system. Check for any leaks at the connections.
Step 11: Start the Engine
If there are no leaks, start the engine and listen for any unusual noises. Monitor the fuel system for a few minutes to ensure everything is functioning correctly.
By following these detailed steps, you can safely install a performance fuel pump, enhancing your vehicle’s fuel delivery system and overall performance.
Testing and Tuning Your Fuel System After Installation

Once you’ve installed your performance fuel pump, the next crucial step is testing and tuning your fuel system. This process ensures that the new pump operates efficiently and delivers the required fuel pressure and flow for your engine’s needs.
Start by checking for leaks around the fuel lines and connections. Inspect all fittings and hose clamps meticulously to ensure a tight seal. Any leaks can not only hinder performance but also pose a safety risk. If leaks are detected, address them immediately before proceeding.
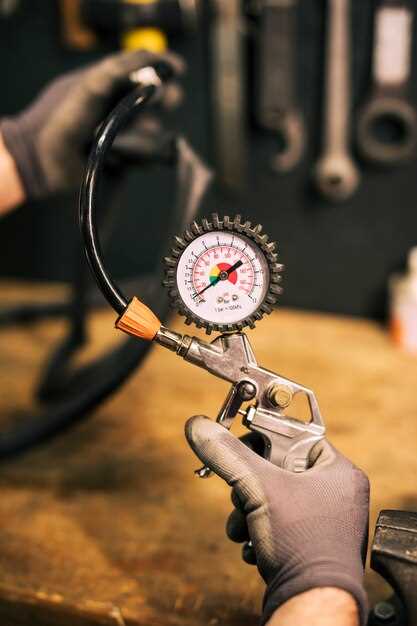
Next, use a fuel pressure gauge to verify that the pump is providing the correct fuel pressure. Refer to your vehicle’s specifications for the appropriate pressure range. Connect the gauge to the fuel rail or test port and start the engine. If the pressure is below or above the recommended range, adjustments may be necessary, possibly requiring a different regulator or settings on the fuel management system.
After confirming appropriate fuel pressure, monitor the fuel flow. This can be done by measuring the amount of fuel dispensed over a specific period. The flow rate should align with the performance specifications of your engine and fuel injectors. If flow rates fall short, reassess the pump installation, lines, and filters for restrictions or blockages.
Next, perform a full throttle test. Take your vehicle for a drive, gradually increasing speed while monitoring performance. Pay attention to the engine’s response, and look for signs of fuel starvation or hesitation. This could indicate that your pump isn’t keeping up with the engine’s demands.
Consider using a wideband oxygen sensor to tune the air-fuel mixture accurately. This device helps in monitoring the air-fuel ratio in real-time, allowing for adjustments to ensure optimal combustion. If the mixture is too rich or too lean, recalibrating the engine’s fuel management software or adjusting the fuel pressure regulator may be necessary.
In addition, check the electrical connections to the fuel pump, ensuring they are secure and functioning correctly. Faulty electrical connections can cause erratic pump operation, which can severely impact engine performance.
Finally, after all adjustments, keep an eye on your fuel trims via an OBD-II scanner. Changes in fuel trims can indicate underlying issues that may need further tuning or adjustments. Consistent monitoring and tuning will help maintain peak performance and efficiency.


