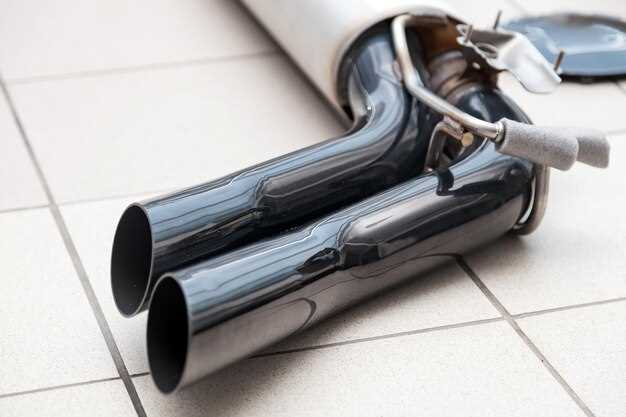
The installation of an aftermarket downpipe is a popular modification among car enthusiasts looking to enhance their vehicle’s performance. A downpipe plays a crucial role in the exhaust system, allowing for improved airflow and reducing back pressure, which can lead to better engine efficiency and increased horsepower. Understanding the process and benefits of installing a downpipe can significantly elevate your driving experience.
In this guide, we will explore the step-by-step process of installing an aftermarket downpipe, discussing essential tools and safety precautions necessary for the task. Additionally, we will highlight the potential benefits that come with this modification, including the impact on turbo performance and sound enhancement. Whether you are a seasoned mechanic or a novice car owner, this article will provide valuable insights to help you successfully complete your downpipe installation.
When considering an aftermarket downpipe, it is important to choose a product that is compatible with your specific vehicle model and meets local emissions regulations. The right downpipe can dramatically change the way your car performs, offering a combination of power gains, improved throttle response, and an exhilarating exhaust note. By following this guide, you can ensure that your installation process is efficient and effective, ultimately leading to a more enjoyable driving experience.
Choosing the Right Aftermarket Downpipe for Your Vehicle
Selecting the appropriate aftermarket downpipe is crucial for optimizing your vehicle’s performance. Several factors come into play when narrowing down your options. Consider the following steps:
-
Vehicle Compatibility: Ensure that the downpipe is designed specifically for your make and model. Compatibility is essential to avoid installation issues.
-
Material Quality: Aftermarket downpipes can be made from various materials. Common options include:
- Stainless Steel: Durable and resistant to rust and corrosion.
- Aluminized Steel: More affordable but less resistant to heat and corrosion.
- Titanium: Lightweight and highly durable but typically more expensive.
-
Design Type: Consider the design of the downpipe, which may affect performance. Options include:
- Catless Downpipes: Offer the best flow but may trigger check engine lights and are not street-legal in some areas.
- Catted Downpipes: Include a catalytic converter, maintaining emissions compliance while improving flow.
-
Size and Diameter: The diameter of the downpipe influences exhaust flow. Generally, a larger diameter allows for better performance but should be compatible with the rest of the exhaust system.
-
Brand Reputation: Research manufacturers known for quality and reliability. Look for customer reviews and performance reports to gauge overall satisfaction.
-
Warranty and Support: Choose a product with a warranty in case of defects. Consider the availability of customer support from the manufacturer.
By carefully assessing these factors, you can select an aftermarket downpipe that aligns with your performance goals and legal requirements, ensuring an effective upgrade to your vehicle’s exhaust system.
Step-by-Step Process for Removing the Stock Downpipe

Removing the stock downpipe is a critical step before installing an aftermarket downpipe. Follow these detailed instructions to ensure a smooth removal process.
Tools Required: You will need a socket set, ratchet, extensions, a torque wrench, and possibly penetrating oil.
Step 1: Prepare the Vehicle
Start by parking your vehicle on a flat surface. Ensure the engine is cool before you begin. Raise the car using a jack and secure it with jack stands to access the underside easily.
Step 2: Disconnect the Battery
To prevent any electrical issues, disconnect the negative terminal from the battery. This ensures safety while you work on the exhaust system.
Step 3: Remove the Undertray (if applicable)
If your vehicle has an undertray, use the appropriate tools to remove it. This will provide better access to the downpipe area.
Step 4: Locate the Downpipe
Identify the stock downpipe location. It’s typically connected to the turbocharger on one end and the rest of the exhaust system on the other.
Step 5: Loosen the Clamps and Bolts
Using the socket set, carefully loosen and remove the bolts that secure the downpipe to the turbo and the exhaust system. Apply penetrating oil to stubborn bolts if needed, allowing it to sit for a few minutes.
Step 6: Disconnect O2 Sensors
Locate and disconnect the O2 sensors connected to the downpipe. Gently pull the plugs from their connectors to avoid damaging the wiring.
Step 7: Remove the Downpipe
Once all bolts and sensors are disconnected, carefully maneuver the downpipe out of its position. It may require some twisting to free it from the turbo and exhaust.
Step 8: Inspect and Clean
After the downpipe is removed, inspect the area for any debris or damage. Clean the mating surfaces to ensure a proper seal when installing the new downpipe.
By following these steps, you will successfully remove the stock downpipe, allowing for the installation of an aftermarket option. Always refer to your vehicle’s service manual for specific details related to your model.
Tips for Properly Installing and Securing Your New Downpipe

Before beginning the installation, ensure you have all necessary tools and components. Common tools include a ratchet set, socket wrenches, and potentially heat-resistant gloves. A quality jack and jack stands or ramps are essential for safely lifting the vehicle.
Start by disconnecting the negative battery terminal to prevent any electrical shorts. This is an important safety step, especially if your vehicle has sensors connected to the exhaust system.
When removing the stock downpipe, be cautious with the exhaust clamps and bolts. Apply penetrating oil to stubborn bolts for easier removal. If any components are rusted or damaged, consider replacing them to avoid complications during reinstallation.
Align the new downpipe correctly with the exhaust manifold and the catalytic converter. Proper alignment is crucial to prevent exhaust leaks. Some aftermarket downpipes may require modifications to fit correctly, so be prepared for adjustments.
Use high-temperature gasket material or new gaskets where the downpipe connects to the turbo and exhaust system to create a proper seal. Tighten all bolts in a criss-cross pattern to ensure even pressure distribution, preventing future leaks.
After securing the downpipe, recheck all connections and ensure they are tight. It is also wise to inspect the routing of any nearby wiring or hoses to ensure they are clear of the downpipe to avoid heat damage.
Start the engine and let it idle for a few minutes. Check for any leaks or unusual noises. Pay attention to the area around the downpipe and ensure that it is not touching any other components, as this could lead to wear and tear over time.
Finally, take the vehicle for a test drive. Listen for any abnormal sounds and pay attention to any changes in performance. A proper installation should result in improved exhaust flow and possibly enhanced engine responsiveness.


