When it comes to maintaining optimal engine performance, one critical aspect often overlooked is engine temperature regulation. An oil cooler kit is an essential upgrade for vehicle enthusiasts seeking to enhance their engine’s efficiency and longevity. By effectively managing oil temperatures, these systems prevent overheating, which can lead to premature wear and potential engine failure.
In this comprehensive guide, we will walk you through the entire process of installing an oil cooler kit in your vehicle. From understanding the components of the kit to completing the installation, you’ll gain insights that will empower you to take control of your vehicle’s thermal management. Whether you’re an experienced mechanic or a novice DIYer, our step-by-step instructions will ensure a smooth installation experience.
Additionally, we will discuss the benefits of upgrading to an oil cooler, including improved oil viscosity, enhanced lubrication, and better overall performance during demanding driving conditions. You’ll learn how to select the right kit for your specific vehicle model and performance needs, making this guide a valuable resource for car enthusiasts and everyday drivers alike. Prepare to dive into the world of oil cooler installations and discover how this simple modification can dramatically impact your vehicle’s performance.
Choosing the Right Oil Cooler Kit for Your Vehicle Model
When selecting an oil cooler kit for your vehicle, compatibility is the foremost consideration. Different car models have unique engine designs and layout requirements, which necessitate specific cooler configurations. Consult your vehicle’s manual or manufacturer specifications to determine the recommended oil cooler type and size.
Assess the engine’s horsepower and potential heat generation. High-performance engines often benefit from larger oil coolers or those designed for racing applications, ensuring optimal temperature management during demanding conditions. Consider the oil capacity of your system as well; a larger capacity may require a more robust cooler to maintain effective temperature control.
Evaluate the mounting options available for your vehicle. Some kits come with universal mounting brackets, while others are vehicle-specific, ensuring a seamless fit. Look for a kit that includes all necessary hardware to simplify installation and ensure stability during operation.
Research the material quality of the cooler. Aluminum is a common choice due to its lightweight properties and excellent thermal conductivity. However, ensure that the selected kit features durable construction to withstand various environmental conditions, including exposure to oil and heat.
Consider the design and airflow characteristics of the cooler. A well-designed oil cooler will have optimal fin density and surface area to enhance heat dissipation. Review user feedback and professional recommendations to identify kits known for effective cooling performance.
Finally, check for warranties and support from manufacturers. A reputable brand will often provide a guarantee on their products, reflecting confidence in their quality and performance. Choosing the right oil cooler kit can significantly impact your vehicle’s longevity and efficiency, making informed decisions essential.
Step-by-Step Installation Process for Your Oil Cooler Kit
Installing an oil cooler kit can enhance your vehicle’s performance and longevity. Follow these steps for a successful installation.
Step 1: Gather Your Tools and Materials
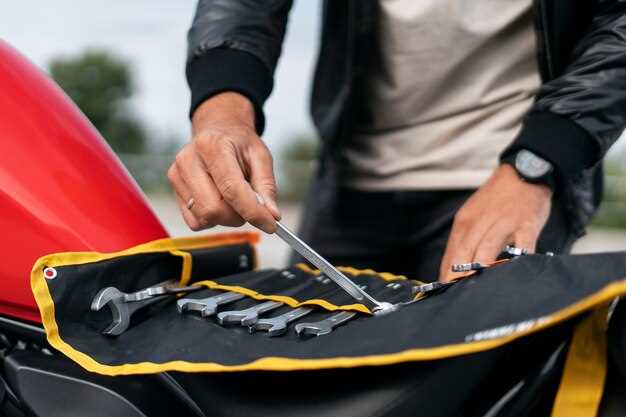
Before starting, ensure you have all necessary tools. You’ll typically need a ratchet set, wrenches, screwdrivers, a torque wrench, and a drill (if required). Additionally, have your oil cooler kit and manufacturer instructions on hand. Protective gear, such as gloves and goggles, is also recommended.
Step 2: Prepare Your Vehicle
Park your vehicle on a flat surface and engage the parking brake. To ensure safety, disconnect the negative terminal of the battery. Allow the engine to cool if it has been running, as oil can be hot and hazardous.
Step 3: Drain the Engine Oil
Locate the oil drain plug underneath the oil pan. Position an oil catch pan underneath and remove the plug carefully. Allow the oil to drain completely. Once drained, replace the drain plug and tighten it securely.
Step 4: Remove the Old Oil Filter
Using an oil filter wrench, carefully unscrew the old oil filter. Be prepared for residual oil to spill out. Clean the mounting surface on the engine block to ensure a proper seal for the new filter. Install the new oil filter, hand-tightening it until secure.
Step 5: Install the Oil Cooler
Refer to the instructions provided with your oil cooler kit. Position the cooler in a suitable location, typically in front of the radiator. Use mounting brackets to secure it in place, ensuring it is stable and free from obstructions.
Step 6: Connect the Lines
Identify the inlet and outlet ports on the oil cooler. Connect the appropriate hoses to the engine’s oil lines, following the directions carefully for proper routing. Tighten hose clamps securely to prevent leaks. If your kit requires drilling or modifications, take care to avoid damaging nearby components.
Step 7: Refill Engine Oil
Once the cooler is installed and all connections are secure, refill the engine with fresh oil through the oil filler cap. Consult your vehicle owner’s manual for the correct oil capacity and type.
Step 8: Test for Leaks
Reconnect the negative terminal of the battery. Start the engine and let it idle for a few minutes. Observe the oil cooler and lines closely for any signs of leakage. If leaks are detected, turn off the engine and tighten all connections as necessary.
Step 9: Check Oil Levels
After the engine has run for a short period, turn it off and wait a minute for the oil to settle. Check the oil level using the dipstick, adding more oil if necessary.
Step 10: Final Inspection
Double-check all connections and ensure the oil cooler is securely mounted. Carefully replace any components that were removed during installation, such as the splash shield or other covers.
Following these steps will help ensure a smooth installation of your oil cooler kit, contributing to better engine performance and longevity.
Maintenance Tips and Common Issues After Installation

After successfully installing an oil cooler kit, regular maintenance and attention to potential issues are essential for optimal performance and longevity. Below are key maintenance tips and common problems you may encounter.
Maintenance Tips
- Regular Inspections: Check the oil cooler and associated lines for any signs of leaks or wear. Inspecting these components every few months can help catch issues early.
- Monitor Oil Temperature: Keep an eye on your oil temperature readings. An unusually high temperature may indicate a malfunctioning cooler or inadequate oil flow.
- Flush the System: Consider flushing the oil system regularly to remove contaminants. This promotes better heat transfer and prevents sludge buildup in the oil cooler.
- Change Oil Filters: Replace the oil filter as per your vehicle’s maintenance schedule, as a dirty filter can affect oil flow and performance.
- Use Quality Oil: Always use high-quality motor oil that meets or exceeds the manufacturer’s specifications. This not only enhances lubrication but also helps in the cooling process.
Common Issues

- Leaking Connections: Poorly secured hoses or fittings can lead to oil leaks. Ensure all connections are tight and consider using thread sealant where necessary.
- Blocked Cooler: Dust and debris can accumulate on the oil cooler’s exterior, obstructing airflow. Regularly clean the cooler to maintain airflow and cooling efficiency.
- Inadequate Cooling: If the oil is still overheating, make sure the cooler is properly sized for your engine and installation. An undersized cooler may not provide sufficient heat dissipation.
- Airflow Restrictions: Check for any components that may block airflow to the oil cooler, such as aftermarket bumpers or modifications. Proper airflow is crucial for cooling performance.
- Mounting Issues: Ensure that the oil cooler is securely mounted. Vibration or movement can damage the cooler or its connections over time, leading to potential failures.
By adhering to these maintenance tips and addressing common issues promptly, you can ensure the effective performance of your oil cooler kit and prolong the life of your vehicle’s engine.


