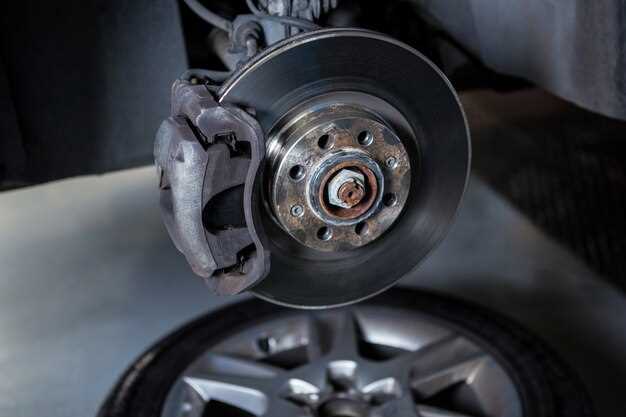
Upgrading your vehicle’s braking system is crucial for enhancing both performance and safety. As automotive enthusiasts seek ways to improve their ride, one of the most effective modifications is the installation of big brake kits. These kits offer superior stopping power, better heat dissipation, and increased durability compared to standard brake setups.
Big brake kits generally include larger rotors, upgraded calipers, and performance brake pads designed to work seamlessly together. Understanding the benefits and considerations of this upgrade can significantly impact your driving experience. Whether you’re an avid track racer or a daily commuter, implementing a big brake kit may be the key to achieving the handling and control you desire.
This guide will explore the essential aspects of choosing and installing big brake kits for various types of vehicles. From selecting the right components to understanding the installation process, we aim to equip you with the knowledge necessary to make informed decisions. Prepare to transform your driving dynamics and safety standards as we delve into the world of big brake upgrades.
Choosing the Right Big Brake Kit for Your Vehicle Model
Selecting the appropriate big brake kit for your vehicle model involves several critical considerations to ensure optimal performance and compatibility. First, assess the specific requirements of your vehicle, including its make, model, and year. Not all kits are universal; many are designed for specific vehicle types to enhance braking efficiency without compromising safety.
Compatibility is paramount. Before purchasing a big brake kit, consult your vehicle’s specifications and any available manufacturer recommendations. This will help you identify kits that fit your wheels, suspension, and overall braking system. Look for kits that provide detailed fitment information, as this can vary significantly even among different trims of the same model.
Next, consider the type of driving you frequently engage in. If you drive in a performance-oriented style, a high-performance big brake kit designed for rigorous conditions may be more suitable. Conversely, if your driving involves routine commuting, a milder kit may suffice. Brake kits can vary in terms of rotor size, caliper design, and materials, all influencing braking performance and feel.
Evaluate the construction materials used in the brake kit. Common materials include aluminum, cast iron, and carbon-composite. Aluminum calipers, for instance, are lightweight and provide better heat dissipation, while cast iron components might be more durable but heavier. Each material has its advantages, so align your choice with your specific performance goals and budget.
Another crucial factor is budget. Big brake kits can range from affordable options to high-end systems with advanced features. Determine your budget beforehand and consider how the investment aligns with your performance expectations. While saving money is essential, compromising on quality can lead to inadequate braking capabilities.
Lastly, do not overlook customer reviews and expert recommendations. Researching user experiences can provide invaluable insight into the reliability and performance of various kits. Additionally, consulting with automotive professionals can help clarify options tailored to your vehicle model and driving style.
Step-by-Step Installation Process for Big Brake Kits

Upgrading your vehicle with a big brake kit can enhance performance and safety. Follow this detailed guide to successfully install a big brake kit.
Step 1: Gather Necessary Tools and Materials
Before starting, ensure you have all the necessary tools: a jack, jack stands, lug wrench, socket set, torque wrench, brake cleaner, and any specific tools required for your big brake kit. Additionally, ensure you have the brake kit components, including calipers, rotors, brake pads, and mounting hardware.
Step 2: Prepare the Vehicle
Park your vehicle on a level surface and engage the parking brake. Loosen the lug nuts slightly but do not remove them yet. Use a jack to lift the vehicle and securely place jack stands underneath to support it. Remove the wheels using the lug wrench.
Step 3: Remove the Existing Brake Components
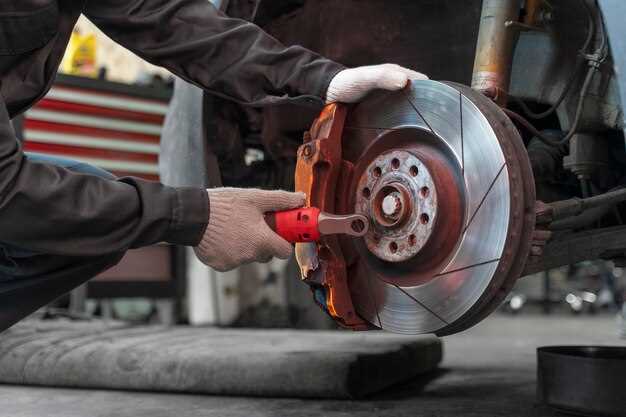
Start by removing the caliper. Unscrew the caliper bolts and carefully slide the caliper off the rotor. Use a bungee cord or a similar tool to hang the caliper from the suspension to prevent strain on the brake line. Next, remove the rotor by unscrewing any retaining screws, if applicable. If the rotor is stuck due to corrosion, gently tap it with a rubber mallet.
Step 4: Install the New Rotors
Clean the new rotors with brake cleaner to remove any protective coating. Position the new rotor onto the hub, ensuring it fits correctly. If your brake kit includes new mounting hardware, use it during installation. Tighten any retaining screws if applicable.
Step 5: Install the Calipers
Prepare the new caliper for installation by checking that the brake pads are fitted correctly. Align the caliper over the rotor and slide it in place. Secure the caliper by tightening the caliper bolts to the manufacturer’s specified torque settings.
Step 6: Attach Brake Lines
If your big brake kit includes new brake lines, carefully detach the old lines and install the new ones. Ensure that all fittings are secure and check for any signs of leaks. If reusing the existing lines, inspect them for any damage and make sure they are properly connected.
Step 7: Install the Wheels
Once all components are installed, reinstall the wheels. Hand-tighten the lug nuts to secure the wheels in place.
Step 8: Lower the Vehicle and Torque the Lug Nuts
Carefully remove the jack stands and lower the vehicle back to the ground. Use a torque wrench to tighten the lug nuts to the recommended specifications to ensure they are secure.
Step 9: Bleed the Brakes
Before taking your vehicle for a test drive, bleed the brake system to eliminate any air trapped in the lines. Start with the wheel farthest from the master cylinder and work your way to the closest. Follow the instructions specific to your brake kit for the best results.
Step 10: Test Drive
Finally, take your vehicle for a slow test drive to ensure the brakes are functioning properly. Pay attention to any unusual noises or behaviors, and make adjustments as necessary.
Following these steps will help ensure a successful installation of your big brake kit, enhancing your vehicle’s braking performance.
Tuning Your Vehicle’s Performance After Big Brake Installation

After installing a big brake kit, enhancing your vehicle’s overall performance is essential for maximizing safety and handling. The upgrade improves braking capabilities, but adjustments to other vehicle systems can further optimize performance.
Start with brake balance tuning. A big brake kit often shifts brake bias forward or backward, potentially leading to uneven braking. Adjusting the brake balance can be done by changing the master cylinder or using adjustable proportioning valves to ensure optimal brake performance during aggressive driving.
Next, consider suspension tuning. The increased weight and heat dissipating ability of bigger brakes may affect handling dynamics. Upgrading your suspension components, such as springs and dampers, can help maintain proper ride height and improve cornering stability. Additionally, consider aligning your suspension to account for the new weight distribution for better traction.
Upgrading tires is another vital step. Big brakes generate more heat, which may affect tire performance. Choose high-performance tires that can provide better grip and handling. The right tires not only improve stopping distances but also enhance overall driving experience by offering better feedback and stability.
Moreover, evaluate your engine performance. Increased braking capability allows for more aggressive driving, which may require more power. Consider tuning the engine for better performance, whether through software adjustments, intake modifications, or exhaust upgrades. An optimized engine will work harmoniously with the enhanced braking system, providing a well-rounded performance boost.
Lastly, don’t neglect the importance of routine maintenance. Regularly check your brake system, including pads and rotors, to avoid performance drops and ensure consistent braking effectiveness. Regular maintenance combined with performance tuning will keep your vehicle operating at its best, delivering the power, control, and safety needed for spirited driving.


