


Fog lights are a vital addition to any vehicle, enhancing visibility during adverse weather conditions such as fog, rain, or snow. Connecting these lights to the Original Equipment Manufacturer (OEM) wiring harness can seem daunting, but with the right steps, it can be achieved effectively. This guide will outline the necessary procedures to ensure a safe and correct connection.
First, it is essential to understand the purpose of each wire in the OEM harness. This knowledge will prevent potential electrical issues and will ensure that the fog lights function as intended. The OEM wiring harness is designed for specific functions and having a clear understanding of the wiring schematic can streamline the installation process.
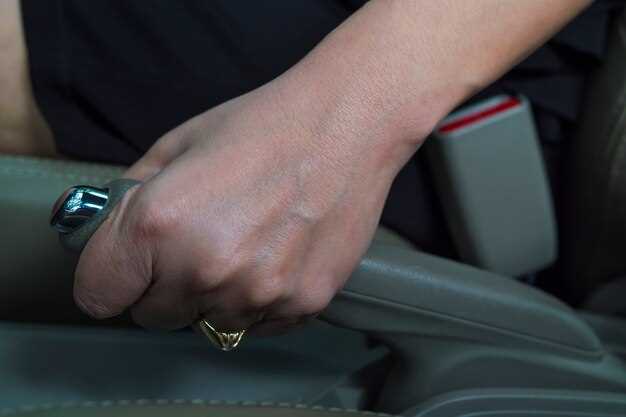
Next, gather the appropriate tools and materials, including wire connectors, electrical tape, and a multimeter. Proper preparation will set the foundation for a successful installation. Safety should always be the priority, so disconnect the vehicle’s battery before beginning the wiring process. This precaution will protect both the vehicle’s electrical system and the technician.
In this article, we will walk you through the step-by-step process of connecting fog lights to your OEM wiring harness, focusing on clarity and precision to ensure you can complete the task efficiently. By following these guidelines, you will enhance your vehicle’s visibility while maintaining the integrity of its electrical system.
Identifying the Correct Wiring Diagram for Your Vehicle
Connecting fog lights to your vehicle’s OEM wiring harness requires precise knowledge of your vehicle’s electrical system. Identifying the correct wiring diagram is a critical first step in this process. Follow these guidelines to ensure accuracy.
- Know Your Vehicle’s Make and Model:
- Ensure that you have the exact make, model, and year of your vehicle. This information is crucial as wiring diagrams can vary significantly even among different trims of the same model.
- Consult the Owner’s Manual:
- Your owner’s manual often contains basic diagrams and details about your vehicle’s electrical system.
- Look for sections that refer to electrical components or fog lights.
- Utilize Online Resources:
- Websites dedicated to automotive repair and modification often have downloadable wiring diagrams.
- Forums and community sites can provide diagrams specific to your vehicle from other enthusiasts.
- Access Repair Manuals:
- Purchase or borrow repair manuals from your local library or auto parts store. Manuals from sources like Haynes or Chilton contain detailed wiring diagrams.
- Verify with a Multimeter:
- If you’re unsure about the wiring, use a multimeter to check connections and voltages, ensuring you follow the correct paths noted in the diagram.
By following these steps and ensuring you have the right wiring diagram, you will eliminate many common pitfalls and make the installation process smoother and more efficient.
Recommended Tools and Equipment for Installation
When it comes to connecting fog lights to an OEM wiring harness, having the right tools and equipment is crucial for a smooth and efficient installation. Here’s a comprehensive list of what you will need:
1. Basic Hand Tools: A set of basic hand tools is essential. This includes a screwdriver set (both flathead and Phillips), wrenches, and pliers. These tools will help you remove any components that may obstruct access to the wiring harness.
2. Wiring Kit: A wiring kit specifically designed for fog lights is highly recommended. This kit typically includes necessary connectors, fuses, and relays that are compatible with the OEM harness, ensuring a secure and reliable connection.
3. Wire Strippers and Crimping Tool: You will need a pair of wire strippers to strip the insulation off the wires, as well as a crimping tool to attach connectors securely. Proper crimping is essential to maintain a good electrical connection.
4. Electrical Tape: Electrical tape is necessary for insulating exposed wires and connections to prevent shorts and ensure safety during operation. Make sure to use high-quality tape for durability.
5. Multimeter: A multimeter is an invaluable tool for diagnosing electrical systems. It can help you check voltage levels and continuity in the wiring, ensuring that everything is functioning correctly before finalizing the installation.
6. Heat Shrink Tubing: Using heat shrink tubing around soldered or crimped connections improves the longevity and reliability of the installation. It provides better insulation and protects against moisture and damage.
7. Ratchet and Socket Set: A ratchet and socket set is often needed to remove or secure bolts that may hold the fog light assembly and its wiring components in place. Make sure to select the correct size for your vehicle.
8. Torque Wrench: If your installation involves securing any bolts to a specific torque specification, a torque wrench is essential. This ensures that connections are appropriately tightened without risking damage to components.
Having these tools and equipment on hand will significantly streamline the process of connecting fog lights to the OEM wiring harness, resulting in a safer and more efficient installation.
Steps to Properly Connect Fog Lights to the OEM Harness
To connect fog lights to the OEM wiring harness effectively, follow these systematic steps to ensure safety and functionality.
1. Gather Tools and Materials: Before starting, collect all necessary tools such as a wire stripper, crimping tool, multimeter, and electrical tape. Ensure you have the fog lights, OEM wiring harness, and any required connectors or adapters specific to your vehicle model.
2. Prepare the Vehicle: Park your vehicle on a flat surface and turn off the ignition. Disconnect the battery by removing the negative terminal to prevent any electrical shorts during installation.
3. Locate the OEM Wiring Harness: Identify the OEM wiring harness designed for fog lights. This harness is usually located behind the front bumper or under the dashboard. Consult your vehicle’s service manual if necessary to find the exact location.
4. Connect the Fog Light Wires: Strip the ends of the fog light wires to expose about 1/4 inch of copper. Match the positive (usually brown or red) and negative (usually black or white) wires from the fog lights to the corresponding wires in the OEM harness. Use the crimping tool to secure connectors onto the wire ends for a reliable connection.
5. Test the Connection: Before finalizing the installation, reconnect the negative battery terminal. Turn on your vehicle and activate the fog lights using the designated switch. Use a multimeter to check that the voltage is reaching the fog light connectors, ensuring they function correctly.
6. Secure and Insulate the Connections: Once confirmed that the fog lights work properly, ensure all connections are secure and insulated. Use electrical tape or heat shrink tubing to cover exposed wire connections. This step helps prevent shorts and protects the connections from moisture.
7. Reassemble Components: After ensuring everything is properly connected and secure, reassemble any components you removed to access the wiring harness. Replace the bumper or any panels and ensure all clips and screws are tight.
8. Final Inspection: Conduct a final inspection of your work. Ensure that the fog lights are correctly aligned and functioning as intended. Check for any loose wires or connections that could cause issues in the future.
By following these steps, you can successfully connect fog lights to the OEM wiring harness, enhancing visibility and safety while driving in low-light conditions.