Blog

  • Installing Quick-Release Bumper Kits

    Installing Quick-Release Bumper Kits

    Installing Quick-Release Bumper Kits

    In the world of automotive customization, quick-release bumper kits serve as a popular upgrade for car enthusiasts seeking both practicality and style. These innovative systems allow users to easily remove and reattach their bumpers, making maintenance, repairs, and modifications more accessible than ever. Whether you are a seasoned mechanic or a weekend DIYer, understanding the installation process can enhance your vehicle’s performance and appearance.

    This guide aims to walk you through the essential steps of installing quick-release bumper kits, ensuring that you can enjoy the benefits of this system with confidence. From selecting the right kit for your vehicle to understanding the tools required for the installation, we will cover every aspect to facilitate a smooth and successful installation experience.

    Furthermore, we will delve into the advantages of using quick-release bumpers, highlighting their impact on functionality and aesthetics. By the end of this article, you will not only gain technical skills but also appreciate how this modification can transform your vehicle into a more versatile and visually appealing project.

    Choosing the Right Quick-Release Bumper Kit for Your Vehicle

    Choosing the Right Quick-Release Bumper Kit for Your Vehicle

    When selecting a quick-release bumper kit, it is crucial to consider several factors to ensure compatibility and performance. First, identify the specific make and model of your vehicle. Each kit is designed to fit particular dimensions and mounting points, so verifying compatibility is essential.

    Material is another significant aspect to evaluate. Quick-release bumper kits are typically made from materials like aluminum, stainless steel, or plastic. Aluminum and stainless steel offer superior durability and resistance to corrosion, while plastic variants may be lighter but less robust. Assess your needs based on driving conditions and whether you prioritize weight savings or strength.

    Furthermore, take into account the weight rating of the kit. If you are frequently driving on rough terrains or planning to use your vehicle for motorsports, a kit with a higher weight rating is advisable to ensure safety and structural integrity during high-impact situations.

    Additionally, consider the installation method. Some kits require drilling or modifications to existing bumper mounts, while others offer a bolt-on design that simplifies the process. If you prefer a straightforward installation, look for kits that provide comprehensive instructions and require minimal modification.

    Style is also important. Quick-release bumper kits come in various designs, so choose one that matches your vehicle’s aesthetics. A cohesive look can enhance the overall appearance, especially if your car is modified or part of a performance project.

    Lastly, read customer reviews and seek expert recommendations. Feedback from fellow car enthusiasts can provide insights into the long-term reliability and performance of different kits, helping you make an informed decision.

    Step-by-Step Process for Installing Quick-Release Bumper Kits
    Step-by-Step Process for Installing Quick-Release Bumper Kits

    Installing a quick-release bumper kit can greatly enhance the functionality and aesthetics of your vehicle. Follow these steps for a successful installation.

    1. Gather Necessary Tools and Materials:

      • Quick-release bumper kit
      • Socket wrench set
      • Screwdriver set
      • Torque wrench
      • Utility knife
      • Safety goggles
      • Dust mask
    2. Prepare the Vehicle:

      Ensure the vehicle is parked on a level surface and the engine is turned off. Open the hood and disconnect the battery to avoid any electrical issues during the installation.

    3. Remove the Existing Bumper:

      • Identify the bolts or screws securing the current bumper to the vehicle frame.
      • Using the appropriate socket or screwdriver, remove these fasteners.
      • Carefully detach the bumper from any clips or brackets, making sure not to damage the vehicle body.
      • Set the old bumper aside for potential future use or disposal.
    4. Install the Quick-Release Brackets:

      Follow the manufacturer’s instructions for the specific alignment and positioning of the brackets.

      • Position the brackets on the vehicle frame and mark drill locations if required.
      • Drill any needed holes, ensuring they are clean and free from debris.
      • Attach the brackets securely using the provided hardware, ensuring they are tightened to the right torque specifications.
    5. Attach the Quick-Release Bumper:

      Carefully align the quick-release bumper to the installed brackets.

      • Using the quick-release system, attach the bumper to the brackets according to the provided instructions.
      • Double-check the alignment to ensure it sits evenly and securely.
    6. Reconnect the Battery:

      After ensuring everything is secured properly, reconnect the battery terminals.

    7. Test the Quick-Release Mechanism:

      Before taking the vehicle on the road, test the quick-release system multiple times to ensure it functions correctly. Make sure the bumper can be quickly attached and detached without resistance.

    8. Final Check:

      Inspect all connections and hardware for tightness. Look for any gaps or misalignments. Confirm that all tools are removed from the work area before starting the vehicle.

    Following these steps will ensure a proper and safe installation of your quick-release bumper kit, enhancing both functionality and style.

    Troubleshooting Common Issues During Installation

    During the installation of quick-release bumper kits, various issues may arise that can impede the process. Identifying and addressing these problems early can save time and ensure a successful installation.

    One common issue is misalignment of mounting brackets. If the brackets do not line up with the existing holes on the vehicle, check the orientation and positioning of the kit. Ensure that all components are correctly installed and that there are no obstructions preventing proper alignment.

    Another frequent problem is difficulty in loosening or tightening bolts. If you encounter resistance, ensure that you are using the correct size and type of tool. Applying penetrating oil can help loosen rusted or stuck fasteners. Additionally, if bolts are stripped, consider using a bolt extractor or replacing the damaged bolts before continuing.

    Inadequate clearance is also a potential issue. After installing the bumper kit, verify that there is sufficient space between the bumper and other vehicle components, such as the fenders and grille. Adjust as necessary to prevent contact during operation.

    Wiring complications may occur, especially with electric components such as fog lights or sensors. Confirm that all electrical connections are secure and properly insulated. If the lights do not function, double-check the continuity of the wires and fuses associated with the bumper kit.

    Lastly, ensure that all instructions provided with the kit are followed accurately. Missing steps or overlooking small details can lead to installation failures. Take your time and refer back to the manual if any uncertainties arise during the process.

  • Best Short-Throw Shifters for Track Cars

    Best Short-Throw Shifters for Track Cars

    Best Short-Throw Shifters for Track Cars

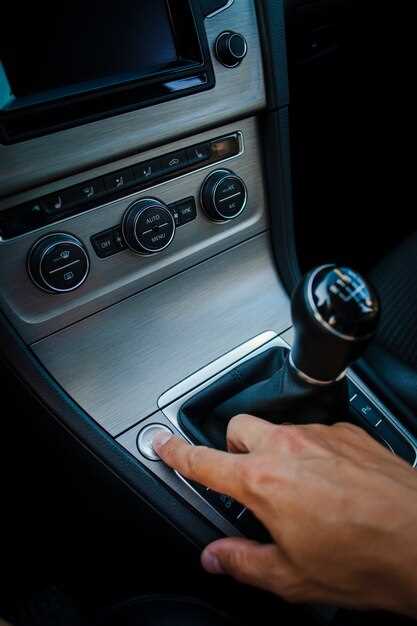
    For racing enthusiasts, the choice of a short-throw shifter can significantly enhance the driving experience on the track. These precision-engineered components are specifically designed to reduce the distance needed to shift gears, allowing for faster gear changes and improved control. Whether you’re a seasoned racer or a weekend warrior, investing in a quality short-throw shifter can lead to better lap times and a more engaging driving feel.

    Short-throw shifters work by altering the pivot point and adjusting the geometry of the shifter mechanism. This results in quicker shifts, which can translate to increased power delivery and acceleration, especially in high-stakes racing situations. Choosing the right shifter is crucial; it should not only match your vehicle’s specifications but also complement your driving style and offer ergonomic benefits.

    In this article, we will explore some of the best short-throw shifters available for track racing cars. We will evaluate their features, material quality, and performance capabilities. Whether you’re looking for enhanced feedback, improved speed, or simply a more enjoyable driving experience, our comprehensive guide will help you make an informed decision. Get ready to elevate your track performance with the right short-throw shifter!

    Top Features to Look for in Short-Throw Shifters

    Top Features to Look for in Short-Throw Shifters

    When selecting a short-throw shifter for track racing cars, several key features can significantly enhance performance and driver experience. Understanding these characteristics ensures optimal gear shifting and overall driving satisfaction.

    1. Throw Reduction Ratio

    The primary feature of a short-throw shifter is its ability to reduce the distance the gear lever travels between shifts. Look for a model that offers a substantial throw reduction, typically between 30% to 50%. Less travel means quicker gear engagement, resulting in faster lap times.

    2. Build Quality

    Materials and construction play a crucial role in durability and performance. Opt for shifters made from high-quality metals or composite materials that can withstand the rigors of track racing. A well-constructed shifter minimizes flex and provides a reliable, solid feel during aggressive driving.

    3. Shift Mechanism Design

    The internal mechanism directly influences the feel of the shifter. Choose a model with precise engineering that promotes smooth, crisp gear changes. Features like roller bearings or ball detents can enhance the shifting experience, providing a noticeable tactile feedback that improves driver confidence.

    4. Ergonomics

    Ergonomic design is essential for comfort, especially during long racing sessions. A shifter with an optimal height and angle that fits comfortably within the driver’s reach can reduce fatigue. Look for adjustable designs that allow customization for a perfect fit.

    5. Compatibility

    Ensure that the shifter is compatible with your specific vehicle make and model. Some shifters are designed for particular gearboxes, so double-checking compatibility is vital to avoid fitment issues and maximize performance.

    6. Installation Ease

    A user-friendly installation process makes for a more attractive product. Many quality short-throw shifters come with detailed instructions and necessary hardware, enabling DIY upgrades without extensive mechanical skills.

    7. Vibrational Feedback

    A desirable short-throw shifter should provide a positive feedback that allows the driver to feel the connection between shifts. Models that minimize vibrations while providing adequate feedback will enhance driving pleasure without causing discomfort during spirited driving.

    8. Adjustability

    Some advanced short-throw shifters offer adjustable throw length and height settings. This feature allows racers to fine-tune their shifter to match personal preferences or specific racing conditions, offering versatility that can be crucial in different track environments.

    By focusing on these key features, drivers can select the most suitable short-throw shifter, ultimately improving their performance and enjoyment on the track.

    Installation Process and Compatibility with Popular Models

    When considering the installation of short-throw shifters for track racing cars, understanding the process and compatibility with various models is essential for optimal performance. The installation generally involves several straightforward steps, though the specifics may vary depending on the vehicle model and the shifter brand.

    First, gather the required tools, including a socket set, screwdrivers, and a torque wrench. Begin by disconnecting the battery to prevent any electrical issues during the installation. Next, remove the center console or trim surrounding the gear shifter to access the stock shifter assembly.

    Once the console is removed, detach the stock shifter from the linkage. This typically involves unbolting the shifter from the transmission, and it may require some finesse to disconnect any cables or electronic components. After removing the stock unit, you can install the new short-throw shifter. Align it with the existing mounting points and tighten the bolts to the manufacturer’s specifications.

    For models like the Honda Civic, Ford Mustang, and Subaru WRX, compatibility is often straightforward, as many aftermarket options are designed specifically for these vehicles. However, always verify the fitment by checking the manufacturer’s guide or website to ensure the selected short-throw shifter is suitable for your specific year and model.

    Finally, reassemble any components you removed, ensuring all electrical connections are secure. After installation, it’s recommended to take the vehicle for a test drive to evaluate the new shifter’s performance. This hands-on evaluation can provide immediate feedback on the shift feel and overall drivability.

    Performance Improvements and User Feedback on Leading Brands

    Performance Improvements and User Feedback on Leading Brands

    Short-throw shifters are essential components in track racing cars, significantly enhancing shifting speed and precision. Users often report dramatic performance improvements after upgrading to leading brands like B&M, Hurst, and Steeda. These manufacturers emphasize engineering that maximizes direct drive and reduces the distance the shifter travels, resulting in quicker gear changes.

    B&M shifters are widely praised for their robust construction and precise feedback. Many users note that the reduced throw distance enhances their ability to downshift smoothly during high-speed cornering, contributing to improved lap times. Feedback from racing enthusiasts indicates that B&M units offer an optimal blend of firmness and adjustability, allowing drivers to fine-tune their setups according to personal preference.

    Hurst has a long-standing reputation in the performance industry, and its shifters are no exception. Users often highlight the classic feel and reliable performance Hurst provides. This brand’s unique design leverages a short-throw mechanism that minimizes the effort needed to shift gears, thus allowing drivers to maintain focus on the track. Many testimonials emphasize that their precision contributes to a more engaging and responsive driving experience.

    Steeda focuses on maximizing the driving experience through intelligent engineering. Users frequently mention the short throw range and enhanced gate lockout features, which help prevent accidental shifts during high-stress racing conditions. The feedback indicates that drivers feel more connected to their vehicles, leading to improved lap consistency and confidence during competition.

    Overall, user feedback on leading short-throw shifter brands highlights their role in elevating both performance and enjoyment in track racing contexts. The enhancements in shifting speed, precision, and driver engagement are frequently cited as key factors that contribute to faster lap times and improved vehicle control. Investing in a quality short-throw shifter is widely regarded as a valuable modification for both amateur and professional racers alike.

  • How to Install an Aftermarket Downpipe

    How to Install an Aftermarket Downpipe

    How to Install an Aftermarket Downpipe

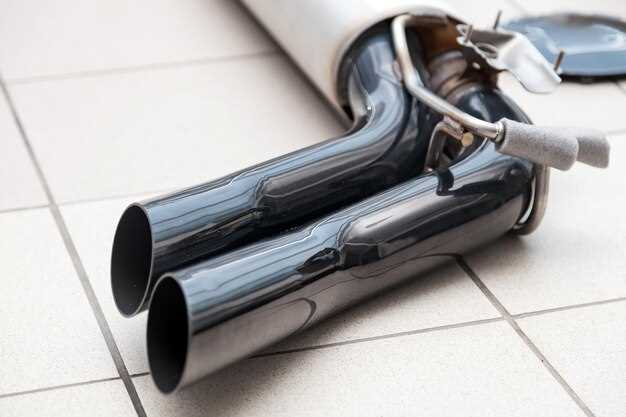
    The installation of an aftermarket downpipe is a popular modification among car enthusiasts looking to enhance their vehicle’s performance. A downpipe plays a crucial role in the exhaust system, allowing for improved airflow and reducing back pressure, which can lead to better engine efficiency and increased horsepower. Understanding the process and benefits of installing a downpipe can significantly elevate your driving experience.

    In this guide, we will explore the step-by-step process of installing an aftermarket downpipe, discussing essential tools and safety precautions necessary for the task. Additionally, we will highlight the potential benefits that come with this modification, including the impact on turbo performance and sound enhancement. Whether you are a seasoned mechanic or a novice car owner, this article will provide valuable insights to help you successfully complete your downpipe installation.

    When considering an aftermarket downpipe, it is important to choose a product that is compatible with your specific vehicle model and meets local emissions regulations. The right downpipe can dramatically change the way your car performs, offering a combination of power gains, improved throttle response, and an exhilarating exhaust note. By following this guide, you can ensure that your installation process is efficient and effective, ultimately leading to a more enjoyable driving experience.

    Choosing the Right Aftermarket Downpipe for Your Vehicle

    Selecting the appropriate aftermarket downpipe is crucial for optimizing your vehicle’s performance. Several factors come into play when narrowing down your options. Consider the following steps:

    1. Vehicle Compatibility: Ensure that the downpipe is designed specifically for your make and model. Compatibility is essential to avoid installation issues.

    2. Material Quality: Aftermarket downpipes can be made from various materials. Common options include:

      • Stainless Steel: Durable and resistant to rust and corrosion.
      • Aluminized Steel: More affordable but less resistant to heat and corrosion.
      • Titanium: Lightweight and highly durable but typically more expensive.
    3. Design Type: Consider the design of the downpipe, which may affect performance. Options include:

      • Catless Downpipes: Offer the best flow but may trigger check engine lights and are not street-legal in some areas.
      • Catted Downpipes: Include a catalytic converter, maintaining emissions compliance while improving flow.
    4. Size and Diameter: The diameter of the downpipe influences exhaust flow. Generally, a larger diameter allows for better performance but should be compatible with the rest of the exhaust system.

    5. Brand Reputation: Research manufacturers known for quality and reliability. Look for customer reviews and performance reports to gauge overall satisfaction.

    6. Warranty and Support: Choose a product with a warranty in case of defects. Consider the availability of customer support from the manufacturer.

    By carefully assessing these factors, you can select an aftermarket downpipe that aligns with your performance goals and legal requirements, ensuring an effective upgrade to your vehicle’s exhaust system.

    Step-by-Step Process for Removing the Stock Downpipe

    Step-by-Step Process for Removing the Stock Downpipe

    Removing the stock downpipe is a critical step before installing an aftermarket downpipe. Follow these detailed instructions to ensure a smooth removal process.

    Tools Required: You will need a socket set, ratchet, extensions, a torque wrench, and possibly penetrating oil.

    Step 1: Prepare the Vehicle

    Start by parking your vehicle on a flat surface. Ensure the engine is cool before you begin. Raise the car using a jack and secure it with jack stands to access the underside easily.

    Step 2: Disconnect the Battery

    To prevent any electrical issues, disconnect the negative terminal from the battery. This ensures safety while you work on the exhaust system.

    Step 3: Remove the Undertray (if applicable)

    If your vehicle has an undertray, use the appropriate tools to remove it. This will provide better access to the downpipe area.

    Step 4: Locate the Downpipe

    Identify the stock downpipe location. It’s typically connected to the turbocharger on one end and the rest of the exhaust system on the other.

    Step 5: Loosen the Clamps and Bolts

    Using the socket set, carefully loosen and remove the bolts that secure the downpipe to the turbo and the exhaust system. Apply penetrating oil to stubborn bolts if needed, allowing it to sit for a few minutes.

    Step 6: Disconnect O2 Sensors

    Locate and disconnect the O2 sensors connected to the downpipe. Gently pull the plugs from their connectors to avoid damaging the wiring.

    Step 7: Remove the Downpipe

    Once all bolts and sensors are disconnected, carefully maneuver the downpipe out of its position. It may require some twisting to free it from the turbo and exhaust.

    Step 8: Inspect and Clean

    After the downpipe is removed, inspect the area for any debris or damage. Clean the mating surfaces to ensure a proper seal when installing the new downpipe.

    By following these steps, you will successfully remove the stock downpipe, allowing for the installation of an aftermarket option. Always refer to your vehicle’s service manual for specific details related to your model.

    Tips for Properly Installing and Securing Your New Downpipe

    Tips for Properly Installing and Securing Your New Downpipe

    Before beginning the installation, ensure you have all necessary tools and components. Common tools include a ratchet set, socket wrenches, and potentially heat-resistant gloves. A quality jack and jack stands or ramps are essential for safely lifting the vehicle.

    Start by disconnecting the negative battery terminal to prevent any electrical shorts. This is an important safety step, especially if your vehicle has sensors connected to the exhaust system.

    When removing the stock downpipe, be cautious with the exhaust clamps and bolts. Apply penetrating oil to stubborn bolts for easier removal. If any components are rusted or damaged, consider replacing them to avoid complications during reinstallation.

    Align the new downpipe correctly with the exhaust manifold and the catalytic converter. Proper alignment is crucial to prevent exhaust leaks. Some aftermarket downpipes may require modifications to fit correctly, so be prepared for adjustments.

    Use high-temperature gasket material or new gaskets where the downpipe connects to the turbo and exhaust system to create a proper seal. Tighten all bolts in a criss-cross pattern to ensure even pressure distribution, preventing future leaks.

    After securing the downpipe, recheck all connections and ensure they are tight. It is also wise to inspect the routing of any nearby wiring or hoses to ensure they are clear of the downpipe to avoid heat damage.

    Start the engine and let it idle for a few minutes. Check for any leaks or unusual noises. Pay attention to the area around the downpipe and ensure that it is not touching any other components, as this could lead to wear and tear over time.

    Finally, take the vehicle for a test drive. Listen for any abnormal sounds and pay attention to any changes in performance. A proper installation should result in improved exhaust flow and possibly enhanced engine responsiveness.

  • How to Bleed Your Brakes Like a Pro

    How to Bleed Your Brakes Like a Pro

    How to Bleed Your Brakes Like a Pro

    Braking systems are essential components of any vehicle, ensuring safety by enabling effective control while driving. Over time, air can enter the brake lines, leading to a spongy brake pedal and reduced stopping power. This situation can significantly compromise your safety on the road.

    Bleeding your brakes is a critical maintenance task that removes trapped air and moisture from the brake fluid, restoring optimal braking performance. This process might seem daunting to some, but with the right tools and guidance, it can be accomplished with confidence.

    In this article, we will delve into the steps necessary to properly bleed your brakes, emphasizing the importance of maintaining a reliable braking system. By following these guidelines, you’ll not only enhance your vehicle’s performance but also ensure your safety and that of others on the road.

    Understanding the Importance of Brake Bleeding

    Understanding the Importance of Brake Bleeding

    Brake bleeding is a crucial maintenance process that ensures the efficient operation of a vehicle’s braking system. Over time, air can accumulate in the brake lines, which negatively impacts brake performance. The presence of air creates a spongy feeling in the brake pedal, reducing responsiveness and increasing stopping distances, thereby compromising safety.

    Additionally, moisture can enter the braking system, leading to corrosion of components and a decrease in the boiling point of brake fluid. This condition, known as vapor lock, can result in brake failure during high-performance situations, such as in emergency stops or during steep descents. By regularly bleeding the brakes, drivers can maintain the integrity of the braking system, ensuring that it operates at its optimal level.

    Routine bleeding also allows for the removal of old, contaminated brake fluid, which can harbor impurities and diminish braking efficiency. Fresh brake fluid is critical for maintaining proper hydraulic pressure, which facilitates quick and precise brake engagement. Thus, understanding the importance of brake bleeding is essential for any vehicle owner aiming to enhance safety and maintain optimal vehicle performance.

    Step-by-Step Guide to Bleed Your Brake System

    Step-by-Step Guide to Bleed Your Brake System

    Bleeding your brake system is essential for maintaining proper brake function and ensuring safety. Follow these steps to effectively remove air bubbles from your brake lines.

    Step 1: Gather Necessary Tools

    Collect all required tools and materials: a brake bleeder kit, a wrench (usually 8mm or 10mm), new brake fluid, a container for old fluid, and a helper if possible. Ensure you have the correct type of brake fluid for your vehicle.

    Step 2: Prepare Your Vehicle

    Park your vehicle on a level surface and engage the parking brake. Remove the wheel where you’ll be bleeding the brakes to access the brake caliper or cylinder.

    Step 3: Check Brake Fluid Level

    Before starting the bleeding process, check the brake fluid reservoir. Ensure it’s filled to the recommended level with fresh brake fluid. Keep an eye on the fluid level throughout the process to prevent it from running dry.

    Step 4: Locate the Bleeder Valve

    Identify the bleeder valve on the brake caliper or wheel cylinder. It typically has a rubber cap that you can remove to expose the valve.

    Step 5: Attach the Brake Bleeder Tool

    Connect your brake bleeder tool or a clear tube to the bleeder valve, placing the other end into a container to catch old fluid and air bubbles.

    Step 6: Bleed the Brakes

    With your helper (if available), have them press the brake pedal slowly and steadily. While they hold the pedal down, use a wrench to open the bleeder valve slightly. You will hear a hissing sound as air and fluid escape. Once the pedal reaches the floor, close the valve before they release the pedal. This process prevents air from re-entering the system.

    Step 7: Repeat the Process

    Repeat the bleeding process until you see clear, bubble-free brake fluid flowing through the tube. It may take several cycles to remove all the air. Remember to periodically check the fluid level in the reservoir, adding fluid as needed to avoid introducing more air.

    Step 8: Move to the Next Wheel

    After bleeding one brake, move to the wheel diagonally opposite (following the right sequence: right rear, left front, left rear, right front) and repeat the same steps until all wheels are bled.

    Step 9: Final Check

    Once all brakes have been bled, double-check the brake fluid level in the reservoir, adding more if necessary. Replace the bleeder valve caps and reattach the wheels securely.

    Step 10: Test Drive

    Finally, take your vehicle for a short test drive at low speeds to ensure the brakes feel firm and responsive. If the pedal feels spongy, you may need to repeat the bleeding process.

    By following these steps, you can ensure your brakes perform optimally, enhancing your safety on the road.

    Troubleshooting Common Brake Bleeding Issues

    Bleeding your brakes is essential for maintaining performance and safety, but issues can arise during the process. Recognizing and troubleshooting these common problems can save time and enhance brake reliability.

    One prevalent issue is the formation of air bubbles in the brake fluid. If the brake pedal feels soft or spongy even after bleeding, it may indicate that air has not been completely expelled from the system. Repeat the bleeding process, ensuring that the brake fluid reservoir is adequately filled throughout and that you are following a consistent bleeding sequence for your vehicle’s brake system.

    Another common problem is fluid leaks. If you notice brake fluid pooling under the vehicle or around the brake components, check for damaged lines, loose connections, or worn seals. Addressing the source of the leak is critical, as insufficient brake fluid can lead to brake failure.

    Inconsistent brake performance can also suggest improper bleeding. Ensure that you are utilizing the correct method for your type of braking system, whether it be traditional, anti-lock (ABS), or others. Referencing the vehicle’s manual will provide guidance on the right procedure to follow.

    It’s also vital to monitor the condition of the brake fluid. Contaminated or old fluid can compromise brake performance. If the fluid appears dark or has debris, it’s advisable to completely flush the brake system rather than just bleeding it. Always utilize the recommended fluid type specified in your vehicle’s manual.

    If the brake warning light remains illuminated after bleeding, this may indicate an issue with the brake system beyond bleeding. Inspect the brake fluid level, check for any error codes using an OBD-II scanner, and consult with a professional mechanic if necessary. Additionally, remember that a stuck brake caliper or seized wheel cylinder can mimic symptoms of improper bleeding, warranting a thorough inspection.

    Lastly, if you’re utilizing a brake bleeder tool and are still experiencing issues, ensure that the tool is functioning correctly. A malfunctioning tool can create a false sense of security regarding the quality of the bleed process. Regular maintenance and checks of your tools can prevent complications during the bleeding process.
  • Diagnosing Electrical Shorts in Your Vehicle

    Diagnosing Electrical Shorts in Your Vehicle

    Diagnosing Electrical Shorts in Your Vehicle

    Electrical shorts in vehicles can lead to various issues, ranging from minor inconveniences to severe complications that could jeopardize the safety and functionality of your car. Identifying and diagnosing these shorts is crucial for maintaining your vehicle’s electrical systems and ensuring optimal performance. Understanding the signs of an electrical short and the diagnostic process can save time and money in repairs.

    The first step in diagnosing an electrical short is to recognize the symptoms. Common indicators include blown fuses, malfunctioning electrical components, or unusual smells and sounds coming from the wiring. These symptoms often suggest a short circuit, which occurs when electricity flows along an unintended path. When you notice these signs, a systematic approach to investigation becomes essential.

    Utilizing the appropriate tools and techniques can make the diagnosis process more efficient. A multimeter, for example, is a vital instrument that can help pinpoint the location of the short by measuring voltage, current, and resistance. By following a structured methodology–such as isolating the affected circuits and examining wiring for signs of wear or damage–you can effectively troubleshoot and ultimately resolve the electrical short in your vehicle.

    Identifying Symptoms of Electrical Shorts in Your Vehicle

    Identifying Symptoms of Electrical Shorts in Your Vehicle

    Electrical shorts can lead to various issues in your vehicle, and recognizing the symptoms early can prevent further damage. One of the most common indicators is the blowing of fuses. If you frequently find that fuses are blowing in your vehicle, this may suggest an underlying short circuit.

    Another symptom to look out for is the malfunctioning of electrical components. If certain features, such as your headlights, radio, or power windows, suddenly stop working or behave erratically, it could indicate an electrical short. Additionally, you might experience intermittent issues where components function sporadically rather than consistently.

    Overheating wiring is a severe warning sign. If you notice any wires or connectors that feel hot to the touch, this could be a result of excessive current flow due to a short circuit. Discoloration or melting around the wiring harness can also signal impending failure.

    Strange smells or visible smoke can be alarming and are crucial symptoms that should not be ignored. If you detect burning odors or smoke emerging from under the dashboard or hood, it’s vital to address the problem immediately, as this poses a risk of fire.

    Issues with the battery, such as rapid drainage or difficulty starting the engine, can also indicate an electrical short. If your battery appears to be losing charge faster than normal, or if you notice corrosion around the terminals, these may be signs of an underlying short circuit.

    Finally, erratic dashboard lights or warning signals can provide critical clues. If warning lights appear unnecessarily or flicker during operation, it’s a sign that there may be electrical problems within the vehicle. Pay attention to these symptoms, as they are key indicators of electrical shorts that need prompt investigation.

    Using a Multimeter to Locate Short Circuits

    Using a Multimeter to Locate Short Circuits

    When diagnosing electrical shorts in your vehicle, a multimeter is an essential tool that can help pinpoint issues quickly and accurately. This device measures voltage, current, and resistance, allowing you to identify short circuits effectively. Here’s how to use a multimeter for this purpose.

    First, ensure the vehicle is off and disconnect the battery to prevent any accidental shorts or damage to the multimeter. Set your multimeter to the resistance (ohm) measurement mode. This setting helps you identify conductive paths that should not exist. Touch the multimeter probes together to check for a zero or near-zero reading, confirming the device is functioning correctly.

    Next, locate the circuit you suspect has a short. Disconnect the components in that circuit to isolate sections and avoid interference from other systems. Place one probe on the ground connection and the other on the positive terminal of the circuit you are checking. A reading of zero or near-zero ohms indicates a direct short; a higher reading shows the circuit is functioning correctly.

    If a short is detected, trace the wiring harness and component connections to find the source. Inspect for damaged insulation, exposed wires, or corrosion that could be causing unintended contact. Continuously use the multimeter to measure different points along the circuit, helping you locate the exact point of failure.

    In cases where the fault is not immediately apparent, you can perform a continuity test. With the multimeter still set to the resistance mode, check each wire segment for continuity. A break in continuity indicates a potential issue with that segment, which may be contributing to the short.

    Lastly, once you find the source of the short, repair or replace the faulty components or wiring. After making the necessary repairs, reconnect your battery and recheck the circuit with the multimeter to ensure the issue has been resolved. Proper use of a multimeter can significantly streamline the process of diagnosing electrical shorts, making your vehicle’s electrical system safer and more reliable.

    Common Wiring Issues and Their Solutions

    Electrical systems in vehicles can experience various wiring issues that lead to malfunctions, including shorts. Identifying these problems early can save you time and money. Below are some common wiring issues along with their solutions.

    1. Frayed or Damaged Wires: Exposure to heat, moisture, or mechanical wear can cause wires to fray. Inspect wiring harnesses for visible damage. If fraying is detected, cut out the damaged section and splice in a new section of wire. Ensure that connections are insulated properly to prevent future shorts.

    2. Corroded Connectors: Corrosion on electrical connectors can lead to poor connectivity and occasional shorts. Regularly inspect connectors for signs of rust or green corrosion. Clean corroded areas using a wire brush or contact cleaner. If corrosion is severe, replacing the connector is advisable.

    3. Loose Connections: Loose connections can cause intermittent electrical failures. Tighten any loose connectors, but avoid over-tightening as it may lead to further damage. Use dielectric grease to help maintain a secure connection and prevent moisture ingress.

    4. Short Circuits: Shorts occur when wires make unintended contact with each other or with grounded surfaces. Use a multimeter to locate shorts by checking continuity where there shouldn’t be any. Repair the wiring by insulating or repositioning the wires away from potential contact points.

    5. Grounding Issues: Faulty ground connections can lead to erratic behavior in electrical components. Check ground wires for continuity and ensure they are securely connected to the chassis. If a ground wire is damaged, replace it and ensure a solid connection to the body or engine block.

    6. Overloaded Circuits: Excessive current can cause overheating and potential shorts. Verify that circuits are not overloaded by ensuring that the load does not exceed the wire gauge’s capacity. If necessary, redistribute the load or upgrade the wiring where appropriate.

    By addressing these common wiring issues proactively, you can prevent electrical shorts and ensure your vehicle’s electrical system operates safely and efficiently.

  • Titanium vs. Stainless Steel Exhausts

    Titanium vs. Stainless Steel Exhausts

    Titanium vs. Stainless Steel Exhausts

    When it comes to automotive performance, the choice of exhaust material can significantly impact efficiency, weight, and sound quality. Two popular materials for exhaust systems are titanium and stainless steel, each presenting its own set of advantages and disadvantages. Understanding these differences is crucial for car enthusiasts and professionals alike aiming to optimize their vehicle’s performance.

    Titanium is renowned for its exceptional strength-to-weight ratio and resistance to corrosion. This lightweight material not only enhances performance by reducing the overall weight of the vehicle but also maintains high durability in extreme temperatures. Its ability to withstand harsh environmental conditions makes it an appealing choice for performance applications.

    On the other hand, stainless steel has long been favored for its robustness and affordability. This material provides excellent resistance to rust and can handle high levels of stress, making it a reliable choice for various driving conditions. While heavier than titanium, stainless steel offers a solid performance at a lower price point, making it accessible for a wider audience of car enthusiasts.

    In this article, we will delve into a detailed performance comparison of titanium and stainless steel exhaust systems, exploring their benefits, drawbacks, and overall impact on vehicle performance. Through this analysis, we aim to equip you with the knowledge needed to make an informed decision regarding your next exhaust system upgrade.

    Weight Differences and Their Impact on Vehicle Handling

    Weight Differences and Their Impact on Vehicle Handling

    One of the most significant differences between titanium and stainless steel exhaust systems is their weight. Titanium exhausts are notably lighter than their stainless steel counterparts, often weighing up to 50% less. This reduction in weight has profound implications on vehicle handling, performance, and overall driving experience.

    Lower weight contributes to improved power-to-weight ratio, allowing the vehicle to accelerate more quickly. Lighter exhaust systems reduce the overall mass of the vehicle, which can enhance responsiveness during acceleration and braking. This is particularly beneficial for performance cars where every kilogram counts towards achieving optimal dynamic performance.

    In addition to acceleration, the weight difference affects the vehicle’s center of gravity. A lighter exhaust system contributes to better weight distribution, which can improve cornering stability. Improved handling can result in a more agile and responsive driving experience, allowing drivers to navigate corners with greater confidence and precision.

    Furthermore, reducing unsprung weight–that is, weight not supported by the vehicle’s suspension–can lead to enhanced suspension performance. When the exhaust system is lighter, the suspension can react more quickly to road imperfections, improving overall ride quality and control. This results in better traction and grip, particularly in high-performance driving scenarios.

    The lighter nature of titanium also reduces stress on mounting points and related components, potentially increasing their longevity and lowering maintenance costs over time. However, it is essential to balance the benefits of a lightweight exhaust with the need for structural integrity and durability, which are strengths often found in stainless steel systems.

    Ultimately, the choice between titanium and stainless steel exhaust systems extends beyond mere aesthetics and sound. The weight differences play a crucial role in how a vehicle handles, accelerates, and performs as a whole. Car enthusiasts seeking optimal performance should consider these factors carefully when selecting their exhaust system.

    Durability and Corrosion Resistance in Real-World Conditions

    Durability and Corrosion Resistance in Real-World Conditions

    When evaluating the performance of titanium and stainless steel exhaust systems, durability and corrosion resistance under real-world conditions play a crucial role. Titanium, known for its exceptional strength-to-weight ratio, is less prone to physical damage compared to stainless steel. It can withstand higher temperatures without deforming, making it ideal for high-performance vehicles that operate under extreme conditions.

    Corrosion resistance is another area where both materials differ significantly. Titanium is naturally resistant to corrosion due to the formation of a protective oxide layer when exposed to air. This makes it highly effective in environments with high moisture or salt exposure, such as coastal regions or regions with frequent road salt use in winter. In contrast, while stainless steel also offers considerable corrosion resistance, its effectiveness can diminish over time, particularly if the protective chromium oxide layer is compromised through scratches or environmental factors.

    In practical applications, the longevity of titanium exhausts can be significantly greater than that of stainless steel under harsh conditions. This is particularly relevant for motorsport applications where exhaust systems are subjected to extreme temperatures and corrosive elements. Furthermore, titanium’s lightweight properties can contribute to improved vehicle handling and performance, further enhancing its appeal in high-performance scenarios.

    However, it is essential to consider the cost factor. Titanium exhaust systems are generally more expensive than their stainless steel counterparts, reflecting the material’s advanced properties and manufacturing techniques. For many everyday drivers, stainless steel exhausts may provide sufficient durability and corrosion resistance at a lower price point, making them a more practical choice for typical driving conditions.

    Ultimately, the choice between titanium and stainless steel exhaust systems should be informed by the intended use, environmental conditions, and budget. For enthusiasts seeking maximum performance and longevity, titanium represents the pinnacle of exhaust technology, while stainless steel remains a robust and cost-effective solution for everyday drivers.

    Sound Quality and Exhaust Note Variations Between Materials

    The choice of material for exhaust systems significantly impacts both sound quality and exhaust note. Titanium and stainless steel exhibit distinct acoustic properties, leading to unique sound characteristics that can enhance or alter the driving experience.

    Titanium exhausts are known for their lightweight nature and ability to produce a sharper, more aggressive sound. The material’s density and stiffness contribute to a higher-frequency exhaust note, often resulting in a sportier and more exhilarating sound profile. Vehicle enthusiasts often prefer titanium for applications where weight savings and performance are prioritized.

    In contrast, stainless steel tends to produce a deeper, more resonant sound. This material, typically heavier than titanium, dampens some of the higher frequencies, resulting in a more robust and full-bodied exhaust note. Stainless steel exhaust systems are often favored for their durability and long-lasting performance, providing a rich sound that can enhance the overall driving experience.

    Variations within each material can also affect sound quality. For instance, the thickness of the material, the design of the muffler, and the overall configuration can lead to significant differences in tone and volume. Titanium exhausts may be designed to enhance specific frequencies, creating a distinctive growl, while stainless steel systems might focus on broader frequency responses, delivering a more balanced sound.

    Ultimately, the choice between titanium and stainless steel for exhaust systems comes down to personal preference regarding sound quality. While titanium offers an aggressive and lightweight option that appeals to performance-driven enthusiasts, stainless steel provides a more traditional and rich exhaust note that many drivers find enjoyable.

  • How to Upgrade to Big Brake Kits

    How to Upgrade to Big Brake Kits

    How to Upgrade to Big Brake Kits

    Upgrading your vehicle’s braking system is crucial for enhancing both performance and safety. As automotive enthusiasts seek ways to improve their ride, one of the most effective modifications is the installation of big brake kits. These kits offer superior stopping power, better heat dissipation, and increased durability compared to standard brake setups.

    Big brake kits generally include larger rotors, upgraded calipers, and performance brake pads designed to work seamlessly together. Understanding the benefits and considerations of this upgrade can significantly impact your driving experience. Whether you’re an avid track racer or a daily commuter, implementing a big brake kit may be the key to achieving the handling and control you desire.

    This guide will explore the essential aspects of choosing and installing big brake kits for various types of vehicles. From selecting the right components to understanding the installation process, we aim to equip you with the knowledge necessary to make informed decisions. Prepare to transform your driving dynamics and safety standards as we delve into the world of big brake upgrades.

    Choosing the Right Big Brake Kit for Your Vehicle Model

    Selecting the appropriate big brake kit for your vehicle model involves several critical considerations to ensure optimal performance and compatibility. First, assess the specific requirements of your vehicle, including its make, model, and year. Not all kits are universal; many are designed for specific vehicle types to enhance braking efficiency without compromising safety.

    Compatibility is paramount. Before purchasing a big brake kit, consult your vehicle’s specifications and any available manufacturer recommendations. This will help you identify kits that fit your wheels, suspension, and overall braking system. Look for kits that provide detailed fitment information, as this can vary significantly even among different trims of the same model.

    Next, consider the type of driving you frequently engage in. If you drive in a performance-oriented style, a high-performance big brake kit designed for rigorous conditions may be more suitable. Conversely, if your driving involves routine commuting, a milder kit may suffice. Brake kits can vary in terms of rotor size, caliper design, and materials, all influencing braking performance and feel.

    Evaluate the construction materials used in the brake kit. Common materials include aluminum, cast iron, and carbon-composite. Aluminum calipers, for instance, are lightweight and provide better heat dissipation, while cast iron components might be more durable but heavier. Each material has its advantages, so align your choice with your specific performance goals and budget.

    Another crucial factor is budget. Big brake kits can range from affordable options to high-end systems with advanced features. Determine your budget beforehand and consider how the investment aligns with your performance expectations. While saving money is essential, compromising on quality can lead to inadequate braking capabilities.

    Lastly, do not overlook customer reviews and expert recommendations. Researching user experiences can provide invaluable insight into the reliability and performance of various kits. Additionally, consulting with automotive professionals can help clarify options tailored to your vehicle model and driving style.

    Step-by-Step Installation Process for Big Brake Kits

    Step-by-Step Installation Process for Big Brake Kits

    Upgrading your vehicle with a big brake kit can enhance performance and safety. Follow this detailed guide to successfully install a big brake kit.

    Step 1: Gather Necessary Tools and Materials

    Before starting, ensure you have all the necessary tools: a jack, jack stands, lug wrench, socket set, torque wrench, brake cleaner, and any specific tools required for your big brake kit. Additionally, ensure you have the brake kit components, including calipers, rotors, brake pads, and mounting hardware.

    Step 2: Prepare the Vehicle

    Park your vehicle on a level surface and engage the parking brake. Loosen the lug nuts slightly but do not remove them yet. Use a jack to lift the vehicle and securely place jack stands underneath to support it. Remove the wheels using the lug wrench.

    Step 3: Remove the Existing Brake Components

    Start by removing the caliper. Unscrew the caliper bolts and carefully slide the caliper off the rotor. Use a bungee cord or a similar tool to hang the caliper from the suspension to prevent strain on the brake line. Next, remove the rotor by unscrewing any retaining screws, if applicable. If the rotor is stuck due to corrosion, gently tap it with a rubber mallet.

    Step 4: Install the New Rotors

    Clean the new rotors with brake cleaner to remove any protective coating. Position the new rotor onto the hub, ensuring it fits correctly. If your brake kit includes new mounting hardware, use it during installation. Tighten any retaining screws if applicable.

    Step 5: Install the Calipers

    Prepare the new caliper for installation by checking that the brake pads are fitted correctly. Align the caliper over the rotor and slide it in place. Secure the caliper by tightening the caliper bolts to the manufacturer’s specified torque settings.

    Step 6: Attach Brake Lines

    If your big brake kit includes new brake lines, carefully detach the old lines and install the new ones. Ensure that all fittings are secure and check for any signs of leaks. If reusing the existing lines, inspect them for any damage and make sure they are properly connected.

    Step 7: Install the Wheels

    Once all components are installed, reinstall the wheels. Hand-tighten the lug nuts to secure the wheels in place.

    Step 8: Lower the Vehicle and Torque the Lug Nuts

    Carefully remove the jack stands and lower the vehicle back to the ground. Use a torque wrench to tighten the lug nuts to the recommended specifications to ensure they are secure.

    Step 9: Bleed the Brakes

    Before taking your vehicle for a test drive, bleed the brake system to eliminate any air trapped in the lines. Start with the wheel farthest from the master cylinder and work your way to the closest. Follow the instructions specific to your brake kit for the best results.

    Step 10: Test Drive

    Finally, take your vehicle for a slow test drive to ensure the brakes are functioning properly. Pay attention to any unusual noises or behaviors, and make adjustments as necessary.

    Following these steps will help ensure a successful installation of your big brake kit, enhancing your vehicle’s braking performance.

    Tuning Your Vehicle’s Performance After Big Brake Installation

    Tuning Your Vehicle's Performance After Big Brake Installation

    After installing a big brake kit, enhancing your vehicle’s overall performance is essential for maximizing safety and handling. The upgrade improves braking capabilities, but adjustments to other vehicle systems can further optimize performance.

    Start with brake balance tuning. A big brake kit often shifts brake bias forward or backward, potentially leading to uneven braking. Adjusting the brake balance can be done by changing the master cylinder or using adjustable proportioning valves to ensure optimal brake performance during aggressive driving.

    Next, consider suspension tuning. The increased weight and heat dissipating ability of bigger brakes may affect handling dynamics. Upgrading your suspension components, such as springs and dampers, can help maintain proper ride height and improve cornering stability. Additionally, consider aligning your suspension to account for the new weight distribution for better traction.

    Upgrading tires is another vital step. Big brakes generate more heat, which may affect tire performance. Choose high-performance tires that can provide better grip and handling. The right tires not only improve stopping distances but also enhance overall driving experience by offering better feedback and stability.

    Moreover, evaluate your engine performance. Increased braking capability allows for more aggressive driving, which may require more power. Consider tuning the engine for better performance, whether through software adjustments, intake modifications, or exhaust upgrades. An optimized engine will work harmoniously with the enhanced braking system, providing a well-rounded performance boost.

    Lastly, don’t neglect the importance of routine maintenance. Regularly check your brake system, including pads and rotors, to avoid performance drops and ensure consistent braking effectiveness. Regular maintenance combined with performance tuning will keep your vehicle operating at its best, delivering the power, control, and safety needed for spirited driving.

  • Coilovers vs. Lowering Springs – What’s Better?

    Coilovers vs. Lowering Springs – What’s Better?

    Coilovers vs. Lowering Springs – What’s Better?

    The world of automotive suspension modifications is vast and often daunting for enthusiasts seeking to enhance their vehicle’s performance and aesthetics. Among the most popular choices are coilovers and lowering springs, each offering unique advantages and drawbacks. Making an informed decision between these two options is crucial for achieving the desired handling characteristics and ride quality.

    Coilovers are a complete suspension system that replaces both the springs and the shocks. This versatility allows for greater adjustability in terms of ride height, damping settings, and overall handling performance. They cater to drivers looking for a customized experience, whether for daily driving or competitive motorsport use. Conversely, lowering springs simply lower the vehicle’s ride height while utilizing the existing shock absorbers. This option is often less expensive and easier to install, making it appealing for those seeking a quick aesthetic upgrade without delving deep into suspension tuning.

    In this article, we will delve into the key differences between coilovers and lowering springs, examining factors such as performance, cost, ease of installation, and long-term benefits. By the end, readers will be better equipped to choose the suspension solution that best aligns with their unique driving needs and preferences.

    Coilovers or Lowering Springs: Which is the Better Option?

    When it comes to modifying a vehicle’s suspension for improved handling and aesthetics, coilovers and lowering springs are two popular options. Each has its own advantages and considerations, making the choice dependent on individual needs and preferences.

    Coilovers

    Coilovers are a type of suspension system that combines a coil spring and a shock absorber into a single unit. They allow for adjustability in both ride height and damping settings, providing a versatile solution for enthusiasts.

    • Adjustability: Coilovers typically offer adjustable ride height, allowing drivers to customize their vehicle’s stance easily. This can enhance both aesthetics and performance.
    • Damping Control: Many coilover systems provide adjustable dampers, enabling users to tailor the ride quality and handling characteristics to their liking.
    • Performance: Coilovers can significantly improve handling and cornering stability due to their stiffer setup and precise tuning options.
    • Cost: Coilovers can be more expensive upfront compared to lowering springs, but they offer greater flexibility over time.

    Lowering Springs

    Lowering springs are a more straightforward solution for reducing a vehicle’s ride height. They typically replace the factory springs without modifying the shock absorbers.

    • Affordability: Lowering springs are generally less expensive than coilovers, making them an attractive option for budget-conscious enthusiasts.
    • Improved Aesthetics: Lowering springs provide a lowered stance, which many drivers find visually appealing.
    • Easy Installation: The installation of lowering springs is often simpler, requiring less time and mechanical expertise.
    • Limited Adjustability: Unlike coilovers, lowering springs usually do not offer height or damping adjustments, which can limit customization options.

    Considerations

    Considerations

    Choosing between coilovers and lowering springs involves several considerations:

    1. Budget: Determine how much you are willing to spend on suspension modifications.
    2. Intended Use: Consider whether you prioritize daily driving comfort, track performance, or aesthetic improvements.
    3. Future Modifications: If you plan to make further modifications to your vehicle, coilovers may be a better long-term investment.
    4. Installation Expertise: Assess your mechanical skills or the resources available for installation.

    Ultimately, the choice between coilovers and lowering springs boils down to personal preference, driving style, and budget. Evaluating your specific needs will guide you toward the best suspension option for your vehicle.

    Comparing Cost and Installation Complexity

    When deciding between coilovers and lowering springs, cost and installation complexity are essential factors to consider. Both options cater to different budgets and technical skills, impacting the overall experience and satisfaction of the modification.

    Cost: Lowering springs are generally more affordable than coilover systems. A typical set of lowering springs can range from $100 to $300, depending on the brand and vehicle compatibility. In contrast, coilovers usually start around $500 and can exceed $2000 for high-end models, which often feature adjustable dampening and ride height capabilities. While the initial investment for coilovers is higher, they provide more extensive customization and performance benefits, potentially justifying the cost for serious enthusiasts.

    Installation Complexity: Installing lowering springs typically requires less technical expertise, making them a suitable option for DIY enthusiasts. Most installations can be completed within a few hours with basic tools and without any specialized equipment. A mechanical shop can handle this job at a reasonable labor cost if you prefer professional installation.

    On the other hand, coilovers involve a more complicated installation process. Their design requires precise adjustments to ensure optimal performance, necessitating more advanced knowledge and tools. Additionally, coilover installations often include setting up adjustable components, which may require specialized alignment tools and techniques. Consequently, hiring a professional for coilover installation is more common, increasing overall costs.

    In conclusion, while lowering springs may seem more budget-friendly and easier to install, coilovers offer superior performance and adjustability for those willing to invest more time and money. Ultimately, the choice depends on individual needs, budget constraints, and the desired vehicle performance outcomes.

    Impact on Ride Quality and Handling Performance

    Impact on Ride Quality and Handling Performance

    When considering the choice between coilovers and lowering springs, the impact on ride quality and handling performance is a critical factor. Coilovers typically offer a more versatile suspension setup, allowing for adjustable ride height and damping settings. This means drivers can fine-tune their vehicle’s suspension to achieve a balance between comfort and performance. The ability to adjust the dampers can enhance the driving experience, especially on varying road conditions.

    In contrast, lowering springs are generally a more straightforward option, lowering the ride height without the complex adjustability of coilovers. While they can improve handling by reducing body roll and lowering the center of gravity, the lack of damping adjustment means that ride quality may suffer. Lowering springs can create a stiffer ride, which may be uncomfortable on rough roads, leading to a harsher overall experience.

    The impact on handling performance is significant for both options. Coilovers provide superior cornering capabilities due to their adjustable characteristics, allowing drivers to achieve optimal handling balance, especially in performance-oriented scenarios. This adaptability makes coilovers appealing to enthusiasts who participate in track events or require precise control during spirited driving.

    Lowering springs, while less versatile, can still enhance handling to a certain degree by providing a lowered stance that improves aerodynamics and stability at speed. However, the fixed nature of lowering springs means they may not perform as well under changing conditions, such as during hard cornering or over uneven surfaces.

    Ultimately, the decision between coilovers and lowering springs depends on the driver’s priorities. Those seeking maximum performance and customization will likely prefer coilovers, while those looking for a budget-friendly option that still offers improved aesthetics and handling may opt for lowering springs. Understanding these differences in ride quality and handling performance is essential for making an informed choice that aligns with individual driving preferences.

    Adjustability and Long-Term Versatility Considerations

    When comparing coilovers and lowering springs, one of the most significant factors to consider is adjustability. Coilovers typically come with adjustable ride height and damping settings, allowing for a customized suspension setup tailored to individual driving preferences and road conditions. This flexibility is particularly beneficial for enthusiasts who participate in motorsports or drive in varying environments, as it enables them to optimize their suspension for different scenarios.

    In contrast, lowering springs generally offer a fixed drop, limiting the ability to adjust ride height once installed. While they can enhance the appearance of a vehicle and provide improved handling, the lack of adjustability means that any changes in driving style, load, or road conditions may necessitate a complete spring replacement.

    Long-term versatility is another critical consideration. Coilovers often have a longer lifespan than lowering springs due to their robust construction and the ability to replace individual components, such as dampers or springs, when wear occurs. This modularity can be a cost-effective solution over time, as maintaining or upgrading specific parts is simpler than replacing an entire setup.

    Furthermore, many coilover systems offer compatibility with aftermarket parts and tuning options, allowing enthusiasts to experiment with different setups as their needs evolve. Lowering springs, while generally simpler and more affordable upfront, may not provide the same level of adaptability as driving demands change or as modifications are made to the vehicle.

    Ultimately, if adjustability and long-term versatility are high priorities, coilovers represent a superior choice. However, for those seeking a more budget-friendly option with less emphasis on customization, lowering springs remain a viable alternative.

  • 5-Speed vs. 6-Speed Transmissions – Key Differences

    5-Speed vs. 6-Speed Transmissions – Key Differences

    5-Speed vs. 6-Speed Transmissions – Key Differences

    The choice between a 5-speed and a 6-speed transmission represents a critical decision for both automakers and consumers. These two types of gearboxes serve the fundamental purpose of transferring power from the engine to the wheels, yet they do so with varying levels of efficiency, performance, and driving experience. Understanding the differences can help drivers make more informed choices based on their needs and preferences.

    5-speed transmissions have long been a staple in the automotive industry, offering a balance between simplicity and performance. They typically provide adequate acceleration and cruising efficiency, making them suitable for a wide range of vehicles, from compact cars to larger sedans. However, as automotive technology has advanced, the limitations of a 5-speed transmission are becoming more apparent, particularly in terms of fuel efficiency and gear ratio options.

    In contrast, 6-speed transmissions have gained popularity in recent years due to their enhanced performance characteristics. By adding an additional gear, manufacturers can optimize gear ratios for better torque distribution and acceleration. This can lead to improved fuel economy on highways and a more responsive driving experience in various conditions. The addition of a sixth gear not only allows for a smoother transition between speeds but also contributes to reducing engine strain during long drives.

    As we delve deeper into the intricacies of 5-speed versus 6-speed transmissions, it is crucial to consider factors such as performance, fuel efficiency, and driving style. Each transmission type has distinct advantages, making the choice a matter of personal preference and vehicle requirements. This article aims to provide a comprehensive comparison to aid readers in understanding which transmission may be the best fit for their automotive needs.

    Fuel Economy Differences Between 5-Speed and 6-Speed Transmissions

    Fuel Economy Differences Between 5-Speed and 6-Speed Transmissions

    The choice between a 5-speed and a 6-speed transmission can significantly impact fuel economy, which is a crucial consideration for many drivers. Generally, a 6-speed transmission offers improved efficiency compared to a 5-speed, primarily due to its design and gear ratios.

    One of the main advantages of a 6-speed transmission is its ability to provide closer gear ratios. This design allows the engine to operate more efficiently within its optimal power band, leading to enhanced fuel efficiency during acceleration and cruising. With a 6-speed setup, the engine doesn’t need to rev as high as it would with a 5-speed transmission, particularly at highway speeds. This reduction in engine RPM translates to lower fuel consumption.

    Additionally, the sixth gear in a 6-speed transmission is often an overdrive gear, which further contributes to fuel economy. An overdrive gear reduces engine speed while maintaining the vehicle’s speed, minimizing fuel usage during long-distance driving. In contrast, a 5-speed transmission may not include this feature, resulting in higher RPMs and increased fuel consumption on highways.

    However, it’s essential to note that the differences in fuel economy between the two transmission types can vary based on factors such as vehicle design, engine type, and driving conditions. In some cases, the improvements with a 6-speed may be marginal and not justify the potential increased cost of maintenance or repairs. Additionally, driving habits play a crucial role; aggressive acceleration can negate the fuel economy benefits regardless of the transmission type.

    In summary, while 6-speed transmissions generally provide better fuel economy due to their closer gear ratios and overdrive capabilities, the actual differences may vary based on various factors. Drivers looking to maximize fuel efficiency should consider their specific vehicle configuration and driving conditions when choosing between a 5-speed and a 6-speed transmission.

    Performance Impact of 5-Speed versus 6-Speed Gear Ratios

    When comparing 5-speed and 6-speed transmissions, one of the key factors influencing vehicle performance is the gear ratios. The additional gear in a 6-speed transmission typically allows for a finer distribution of power across a wider range of speeds, which can enhance acceleration and overall responsiveness.
    In a 5-speed transmission, the gaps between each gear are larger, which can lead to a noticeable drop in engine RPMs during shifts. This can potentially cause a reduction in power delivery, especially in scenarios requiring quick acceleration, such as merging into traffic. Conversely, a 6-speed transmission provides more closely spaced ratios, enabling the engine to stay within its optimal power band during shifts and maintaining better acceleration.

    Fuel efficiency is also a significant consideration when assessing the performance impact of gear ratios. A 6-speed transmission typically includes an overdrive gear, allowing for lower engine RPMs at highway speeds compared to a 5-speed transmission. This can lead to improved fuel economy, reducing engine strain and wear over long-distance travel.

    Moreover, 6-speed transmissions often contribute to a more engaging driving experience. The additional gear enables drivers to better match engine power with driving conditions, whether accelerating on highways or navigating low-speed environments. Sports and performance vehicles often favor 6-speed transmissions for their potential to maximize engine performance and responsiveness.
    However, the performance gains provided by a 6-speed transmission can be influenced by factors such as engine output, vehicle weight, and intended usage. In some cases, a well-tuned 5-speed transmission may offer sufficient performance for standard driving needs without the added complexity or weight of a 6-speed system.

    Ultimately, the choice between a 5-speed and a 6-speed transmission involves weighing the benefits of improved acceleration and fuel efficiency against the vehicle’s specific performance requirements and driving style. Each option has its advantages, and the right choice will depend on individual preferences and driving conditions.

    Maintenance Considerations for 5-Speed and 6-Speed Transmissions

    Maintenance Considerations for 5-Speed and 6-Speed Transmissions

    Regular maintenance is essential to ensure the longevity and performance of both 5-speed and 6-speed transmissions. While both types share some common maintenance practices, specific considerations should be taken into account due to their structural and functional differences.

    For both transmission types, regular fluid changes are crucial. Transmission fluid lubricates moving parts, prevents overheating, and facilitates smooth shifting. Typically, fluid should be replaced every 30,000 to 60,000 miles, but checking the manufacturer’s recommendations is always best. A well-maintained transmission fluid level and quality will help to avoid premature wear.

    5-speed transmissions generally have a simpler design compared to their 6-speed counterparts. This simplicity can translate into fewer components that require maintenance. However, they may place more strain on the transmission fluid due to higher RPMs during operation, especially in manual configurations. It’s essential to monitor the condition of the fluid closely and look for signs of burning or contamination.

    6-speed transmissions often provide quicker shifts and better fuel efficiency, but their increased complexity can make maintenance more challenging. More gear options mean that the internal components can experience varied wear patterns. It’s advisable to perform inspections more frequently to ensure that all synchronization components and clutches are working correctly. Additionally, the introduction of dual-clutch systems in many modern 6-speed transmissions may necessitate specialized service protocols.

    Both transmission types benefit from periodic inspections of external seals and gaskets. Over time, these components can degrade, leading to fluid leaks, which compromise performance. Inspecting for leaks, cracks, or signs of wear can prevent more significant issues down the line.

    In addition to mechanical upkeep, attention should be paid to driving habits. Smooth acceleration and deceleration can prolong the lifespan of both 5-speed and 6-speed transmissions, as aggressive driving can accelerate wear and tear.

    Overall, while the maintenance needs of 5-speed and 6-speed transmissions share some similarities, the differences in their design should guide specific procedures and frequency of inspections to maintain optimal performance and reliability.

  • Top Car Battery Brands for Performance Builds

    Top Car Battery Brands for Performance Builds

    Top Car Battery Brands for Performance Builds

    When it comes to building a high-performance vehicle, the importance of a reliable car battery cannot be overstated. A top-quality battery not only powers crucial electronic systems but also provides the necessary energy for high-demand components, ensuring that your vehicle operates at peak performance. Selecting the right battery brand can significantly impact your build’s reliability and efficiency.

    Numerous brands on the market claim to offer superior performance, but knowing which ones truly stand out is essential for enthusiasts and professionals alike. Factors such as battery chemistry, capacity, cold cranking amps (CCA), and overall longevity play pivotal roles in determining the right battery for your performance-oriented applications. Choosing a reputable brand can be the difference between a smooth drive and unexpected breakdowns.

    In this article, we will delve into the top car battery brands that have established themselves as leaders in the high-performance segment. We will examine their unique features, strengths, and why they are trusted by car enthusiasts around the world. Whether you are racing at the track or cruising in a modified street vehicle, these brands provide the reliability and power necessary to meet the demands of any high-performance build.

    Evaluating Battery Specifications for Modified Engines

    Evaluating Battery Specifications for Modified Engines

    When upgrading to a modified engine, understanding battery specifications is crucial for optimal performance. A high-performance engine typically demands more power, making it essential to select a battery that meets these needs. Key specifications to consider include cold cranking amps (CCA), amp hour (Ah) rating, and physical dimensions.

    Cold Cranking Amps (CCA) is a measurement of the battery’s ability to start an engine in cold temperatures. For modified engines, especially those with high compression ratios, look for batteries with a higher CCA rating to ensure reliable starting during varying temperature conditions.

    The amp hour (Ah) rating determines how long a battery can deliver a specific amount of current. For performance vehicles with added electronic components, such as aftermarket audio systems or performance tuning devices, a higher Ah rating is essential to prevent voltage drops and maintain consistent power supply.

    Another critical factor is the physical dimensions of the battery. Ensure that the selected battery fits properly in your vehicle’s battery tray without compromising secure mounting. A poorly fitted battery can lead to movement and potential damage during high-performance driving.

    Finally, consider the technology used in the battery. Options include traditional lead-acid, absorbed glass mat (AGM), and lithium batteries. AGM batteries provide superior performance and leak resistance, making them suitable for many modified applications. Lithium batteries offer significant weight savings and higher power density, appealing for racers aiming to reduce overall vehicle weight.

    In conclusion, evaluating battery specifications is vital when supporting modified engine builds. Prioritizing CCA, Ah rating, dimensions, and technology can significantly enhance your vehicle’s performance and reliability.

    Comparing Price vs. Performance in Racing Batteries

    Comparing Price vs. Performance in Racing Batteries

    When selecting a racing battery, many enthusiasts face the dilemma of balancing price and performance. High-performance batteries, such as those designed for racing applications, often come with a hefty price tag due to advanced technologies and materials used in their construction. However, understanding the relationship between cost and performance can help determine whether the investment is justified.

    Racing batteries typically utilize lightweight materials like lithium or high-grade lead-acid to improve power-to-weight ratios, which are critical in competitive environments. While these batteries tend to be more expensive, they offer superior discharge rates, faster charging times, and longer lifespans compared to traditional batteries. This means less downtime and potentially lower replacement costs in the long run.

    On the other hand, budget-friendly options may appeal to those who prioritize initial cost savings. While lower-priced batteries can provide adequate performance for daily driving or entry-level racing, they often lack the durability and power output required for serious competition. Consequently, their performance may decline significantly under extreme conditions, leading to potential failures during races.

    Ultimately, the choice between price and performance in racing batteries depends on individual needs, race requirements, and budget constraints. Serious competitors are usually better served by investing in high-performance batteries that enhance vehicle capability, while casual racers might opt for more economical alternatives that fulfill their needs without breaking the bank.

    Thorough research and comparisons of various brands and their offerings can aid in making an informed decision. Consider factors like weight reduction, cold-cranking amps, cycle life, and warranty when evaluating options. Balancing these elements with budget constraints can lead to a well-rounded choice that optimizes both price and performance for racing applications.

    Understanding the Impact of Weather on Battery Selection

    Weather conditions play a crucial role in the performance and lifespan of car batteries. Extreme temperatures, both hot and cold, can significantly affect the efficiency and reliability of a battery. In hot climates, the heat can accelerate the chemical reactions within a battery, leading to a higher risk of evaporation and corrosion. This can result in decreased battery life and premature failures, making it essential to choose a battery designed to withstand high temperatures.

    Conversely, cold weather poses its own challenges. Low temperatures can slow down the chemical reactions necessary for the battery to generate power, making it harder for the engine to start. Additionally, cold conditions can lead to a loss of capacity, meaning the battery may not perform as expected when needed. Selecting a battery with a higher cold cranking amp (CCA) rating is advisable for regions that experience harsh winters, as it indicates the battery’s ability to produce the necessary power to start an engine in cold conditions.

    Furthermore, fluctuating weather conditions can introduce additional stress on a battery. Batteries may experience thermal cycles that can lead to expansion and contraction of materials, potentially contributing to early wear. It is beneficial to choose batteries that feature robust construction, such as those with enhanced durability and resistance to vibration and extreme environmental conditions.

    Finally, regular maintenance and monitoring are essential, particularly in areas with severe weather patterns. Ensuring connections are clean and terminals are protected can help mitigate the adverse effects of the environment. By understanding the specific demands that weather conditions place on car batteries, vehicle owners can make informed decisions to select the most suitable battery for their high-performance builds.