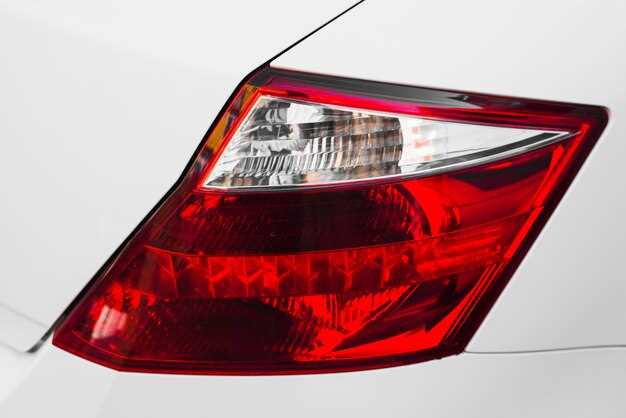
Upgrading your vehicle’s taillights is more than just an aesthetic choice; it’s a vital aspect of ensuring safety on the road. Aftermarket taillights offer a variety of designs that can enhance your vehicle’s appearance while simultaneously improving visibility to other drivers. With numerous options available, finding the perfect balance between style and functionality is essential.
When selecting aftermarket taillights, it’s important to consider not only their visual appeal but also their compliance with safety standards. High-quality aftermarket options are equipped with advanced features such as LED technology, which provides brighter and faster illumination, ensuring that your vehicle is seen by others, especially in low-light conditions. This combination of style and safety can significantly contribute to reducing accident risks on the road.
In this article, we will explore various types of stylish and safe aftermarket taillights available for different vehicle models, discuss the benefits of upgrading your taillights, and provide tips on installation and maintenance to help you make an informed decision.
Choosing the Right Style: Compatibility with Your Vehicle’s Aesthetics

Selecting aftermarket taillights requires careful consideration of your vehicle’s overall aesthetic appeal. The right choice not only enhances appearance but also complements the design elements of your car, truck, or SUV.
When evaluating styles, first consider the existing features of your vehicle. Body lines, curves, and the shape of the rear end are crucial in determining what taillight design will harmonize with the overall look. For example, a sporty vehicle may be better suited to sleek, angular taillights, while a classic car might require vintage-styled options that maintain its original charm.
Different finishes also play a vital role in aesthetic compatibility. Options vary from smoked lenses to clear or colored designs, and each finish can drastically change the vehicle’s presence. Smoked taillights lend a more aggressive look, while clear or red options can provide a clean and classic appeal. Assessing the vehicle’s color palette will help you decide which finish will create the desired visual impact.
Furthermore, it’s important to align the taillight style with the vehicle’s usage. A rugged SUV or truck might benefit from more robust, off-road-inspired taillights that offer durability and function, while a luxury sedan may call for sleek, elegant designs that enhance its sophisticated profile.
Ultimately, the perfect aftermarket taillight should not only fit your personal style but also enhance the innate characteristics of your vehicle. Ensuring that both design and functionality align will result in a cohesive and visually appealing upgrade that stands out while providing essential safety features.
Ensuring Safety: Key Features to Look for in Aftermarket Taillights

When considering aftermarket taillights, safety should be the foremost priority. One essential feature is compliance with regulatory standards. Look for taillights that meet the safety requirements set by organizations such as the Department of Transportation (DOT) or the Society of Automotive Engineers (SAE). This ensures that the lights are properly designed and tested for visibility and durability.
Another critical aspect is brightness and visibility. Taillights should be bright enough to be seen in various weather conditions, including fog, rain, and nighttime. LED taillights are a popular choice due to their brightness and energy efficiency. Ensure they provide optimal light output for your specific vehicle model to enhance visibility from a distance.
Durability is also vital. Choose taillights made from high-quality materials that can withstand harsh environmental conditions, such as UV exposure and road debris. Look for features like weather sealing and impact resistance, which protect the lights from moisture and physical damage. This will help maintain functionality and appearance over the long term.
Consider the ease of installation as well. Aftermarket taillights should come with a user-friendly installation manual and all necessary components. A straightforward installation process reduces the risk of improper fitting, which can affect safety and performance.
Finally, it’s beneficial to choose taillights that offer additional safety features such as sequential turn signals or integrated reflectors. These features can enhance the visibility of your vehicle, making it easier for other drivers to see your intentions on the road. In addition, ensure that the taillights are designed to fit your vehicle model precisely, which will optimize performance and safety.
Installation Tips: Step-by-Step Guide for DIY Enthusiasts
Installing aftermarket taillights can enhance both the style and safety of your vehicle. Follow this step-by-step guide to ensure a smooth installation process.
Step 1: Gather Tools and Materials
Before you begin, collect all necessary tools and materials. You’ll typically need a screwdriver (flathead and Phillips), pliers, a socket set, and dielectric grease. Ensure you have your new taillights ready and check that they are compatible with your vehicle model.
Step 2: Prepare Your Vehicle
Park your vehicle on a flat surface and engage the parking brake for safety. Turn off the ignition and disconnect the battery to prevent any electrical issues during the installation.
Step 3: Remove the Original Taillights
Locate the screws or clips securing the factory taillights. Use the appropriate screwdriver to carefully remove them. Once loose, gently pull the taillight assembly away from the vehicle. Be mindful of connected wiring harnesses; disconnect them carefully to avoid damaging any components.
Step 4: Connect the New Taillights
Take your new taillights and connect the wiring harnesses to the corresponding sockets. Ensure that the connections are secure and that the wires aren’t pinched or exposed. Apply a small amount of dielectric grease to the connections to prevent corrosion.
Step 5: Install the New Taillights
Position the new taillight assembly into place and secure it with screws or clips. Ensure that it lies flush against the vehicle body for a professional look. Double-check that all screws are tightened adequately.
Step 6: Test the New Taillights
Before reattaching the battery, turn on the ignition and test the new taillights. Check for proper functionality, including brake lights, turn signals, and reverse lights. If everything works correctly, proceed to the next step.
Step 7: Reconnect the Battery
Once testing is complete, turn off the ignition and reconnect the battery. Ensure the connections are tight and secure. This will restore power to your vehicle’s electrical system.
Step 8: Final Check
After everything is reconnected, perform one final check. Ensure all lights are functioning and that there are no loose components. Take your vehicle for a short drive to confirm that the new taillights behave as expected.
Following these steps will help you successfully install stylish and safe aftermarket taillights on your vehicle, enhancing both its aesthetics and visibility on the road.


